Some Stuff To Do With Portraiture

Got that portrait bug again.

Not sure what got it going, but it is here and I have been having fun.

Looking at a problem that has been close to me buying the most ridiculously large bag ($450au 5.11 CAMS bag), so I can take all* my stands, mods, flash units, LED’s etc, I decided to look at the problem another way.

Manfrotto 5002BL Nano light stands seems to be the go if you want small stands. My smaller Neewer stainless are 70+cm long for 2.1 meters tall, the Nano’s are 50cm long for 2 meters tall.

That 20cm means I can fit them in a small 40L suit case (that I have already). They take 4kg and seem steady enough with a flash, bracket and Smallrig 55cm soft box on (the stem bends, which seems to be what they do happily). I would be happier with a brolly or brolly soft box because they are centre balanced and softer for their size, but the soft box fits in the case, my brollies don’t.

I forgot to put the two C-mount flash brackets in, but they fit fine. I can also add the RB-9, two flash units and controller, but they would probably be in their respective camera bags anyway. The heaviest bit of the kit is the Amaran power brick and 970 NP batts.

The case is about the same volume as my Domke roller bag, just a different shape. I can now take my G9II small backpack setup (The case is about the same volume as my Domke roller, just a different shape).

I can now take my G9II video backpack kit, which handles sound, some lighting and the camera with this case for lighting, with little discomfort.

Alternatively, it can be studio lighting lite, meaning two flash units with brackets and stands, the soft box and or a couple of brollies strapped to the outside (or in my tripod bag).

The background above is one of my cheap backdrop rolls. The “Jonah” faux leather furniture fabric is my “Annie Leibovitz” look backdrop. For $17/m and 1.5m wide, it can be cut to any length (this is over 3m), looks a bit like an Oliphant hand painted and comes in several colours. I have the Donkey brown above, a grey version, a light stone and tan leather.

The leather-like fabric drops creases out as you watch, can be walked on, painted, wiped down, crumpled for effect , is soft to sit on and light. Because it is furniture fabric, it comes in 1.5m wide rolls. Curtain fabric can be wider, but not in this stuff unfortunately (leather curtains anyone?). For wider you can either hang it sideways or hang several panels in Leibovitz style backdrop in a working space;

https://www.vanityfair.com/hollywood/photos/2017/05/star-wars-the-last-jedi-portraits-annie-leibovitz

These were fun and although they have not been used much, they are great to have along side my Manfrotto Pewter/Walnut and Grey/Black collapsibles.

Hankering for something else, I decided to look into other colours. Fuelled with enthusiasm, I went to the local Spotlight with a half dozen book marked on my phone, but found most were either too shiny or simply not what their picture looked like.

Undaunted I kept looking.

I came back with a soft sky blue cotton canvas, a darker mottled denim blue and a different take on the faux leather, a faux suede in a steel grey. The Faux suede looks like it can have a fake brush effect applied, but I am not sure it will make any photographic difference.

The two cloth ones are matt, durable and heavy. One was under $12/m for a double sided weave and has a perfect ragged edge if the backdrop is fully visible (on trend it seems).

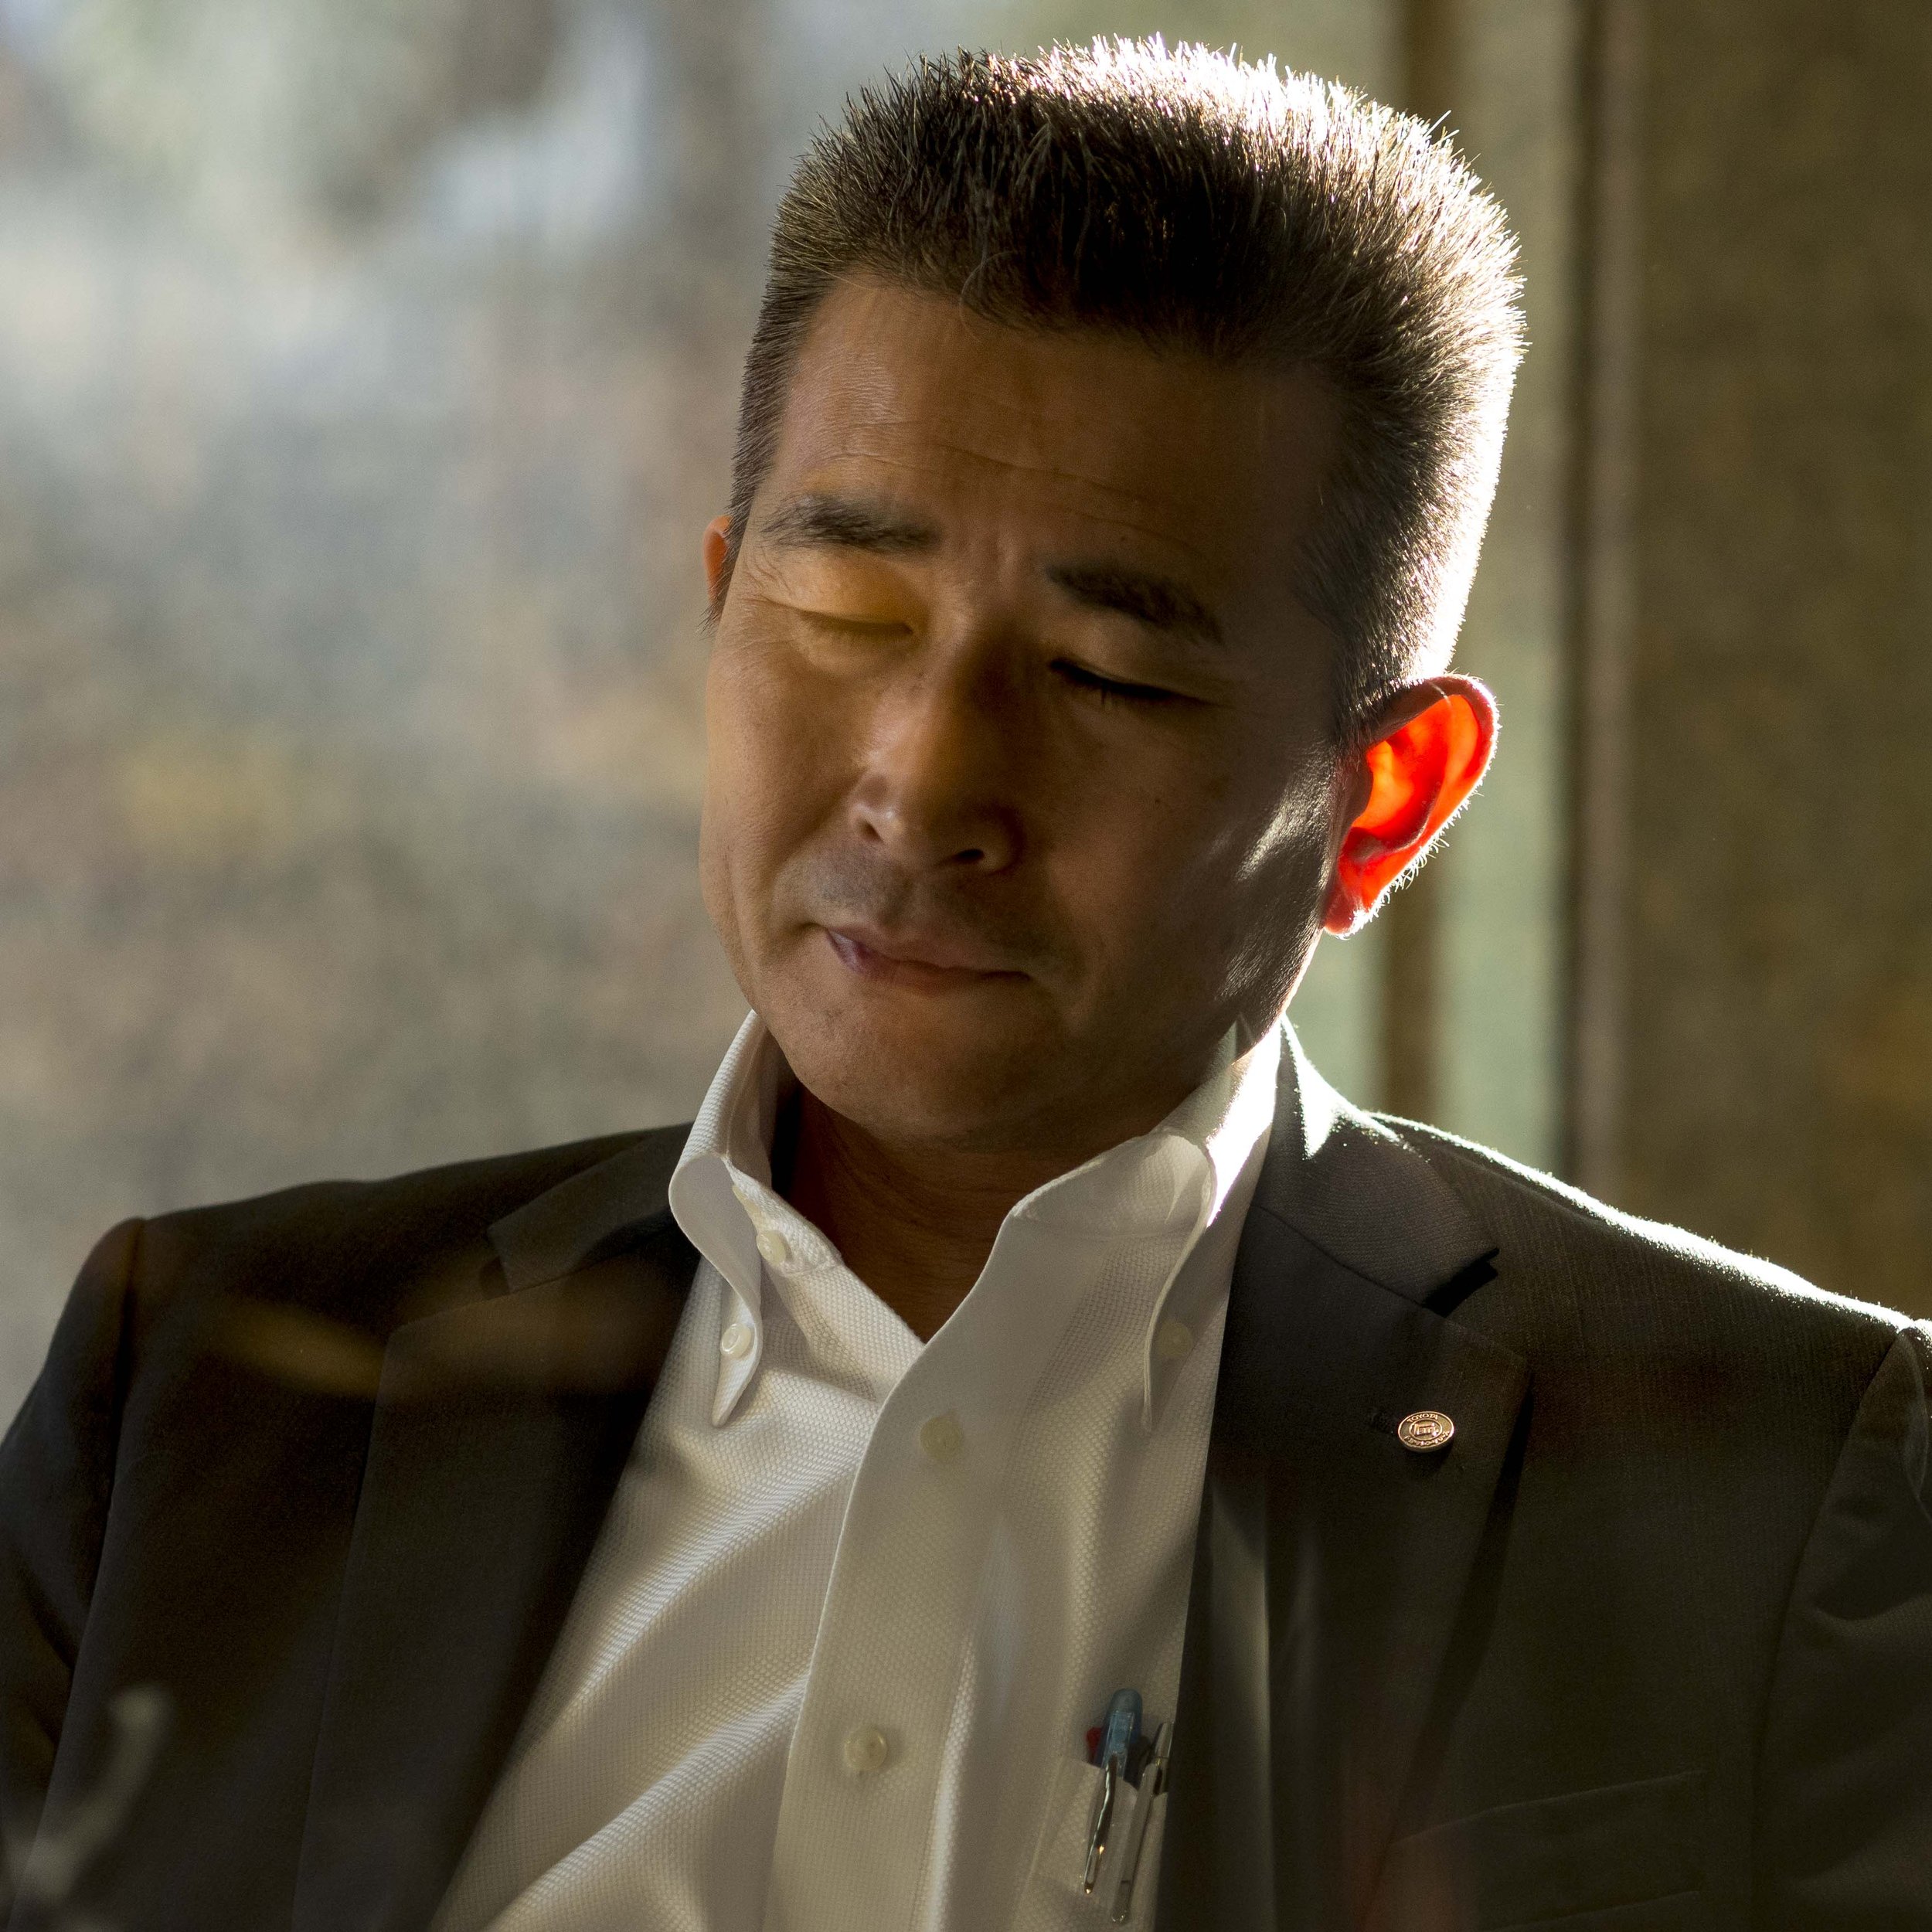
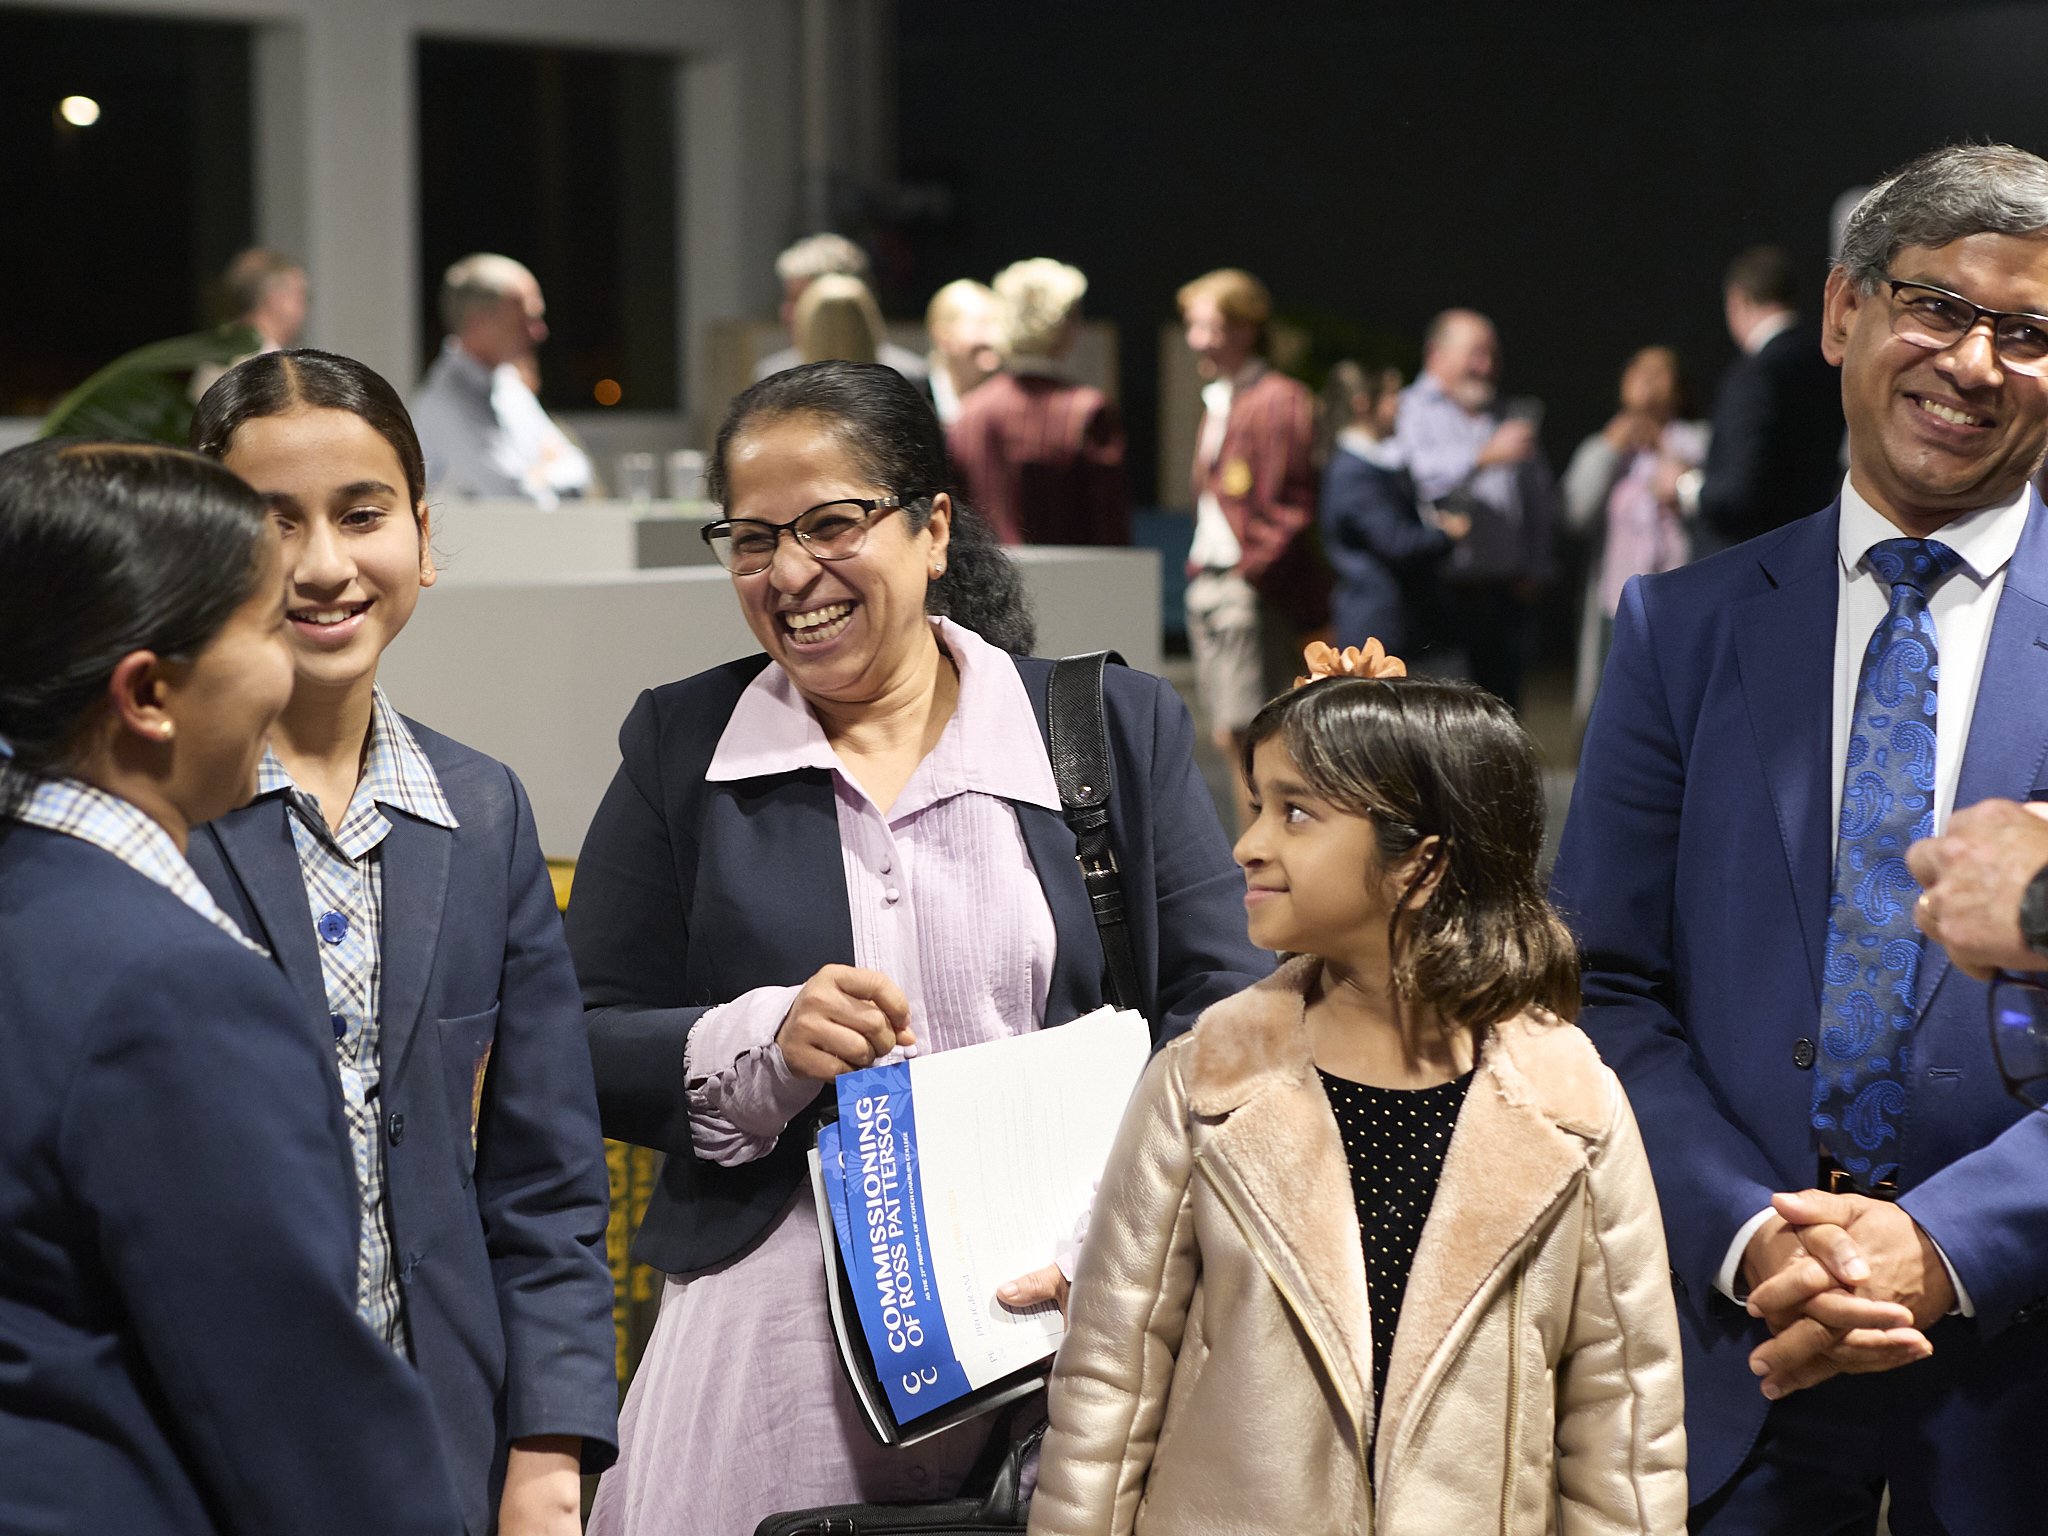
The cheapest one about 2m behind my model (Joe Black) with the Smallrig softbox above my head pointed down for some butterfly effect. Some texture, variable colour based on light wash and it is hanging straight and uncreased over the one above without even clamping.

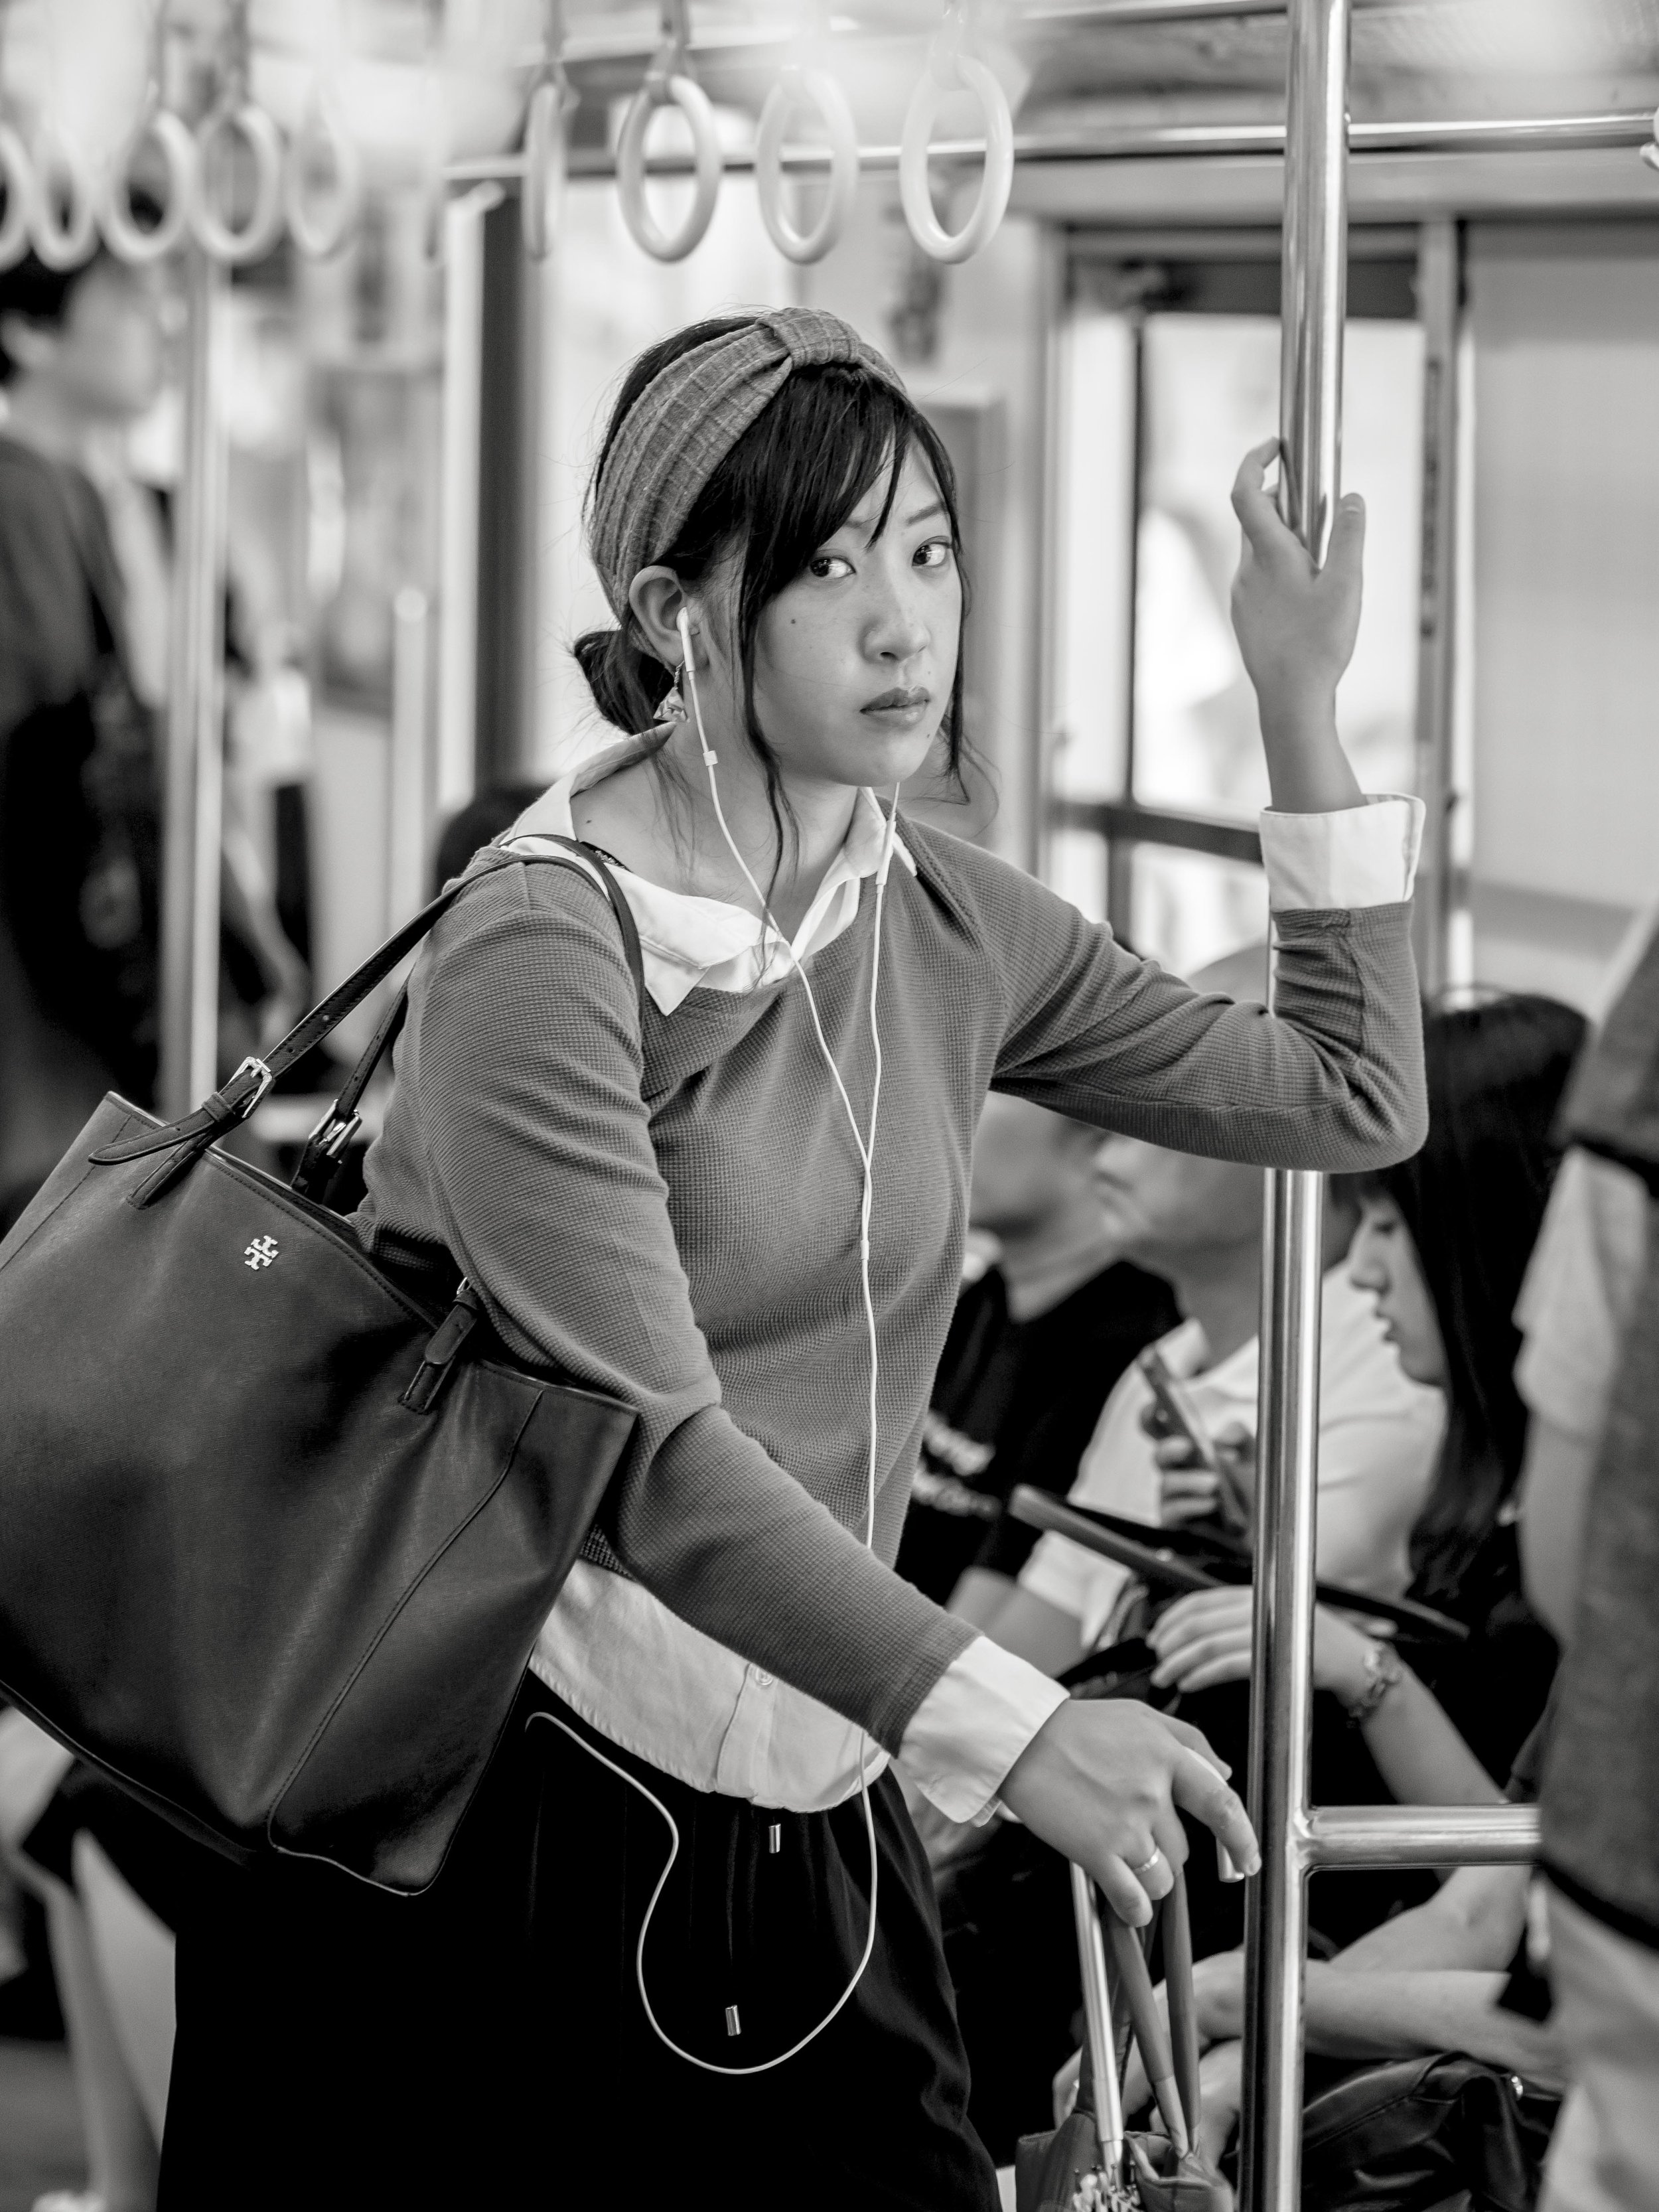
This is the cloth quite close and fairly accurate to colour, That wonderful balance between slight texture and perfect consistency. I am tempted to go back and get the remains in the roll, because I think it could take a some gentle spray paint magic or a wrung out look.

Tests are good and give you confidence in your processes.

I now know the little softbox is more efficient than a reversed 42” white brolly by about 2 stops, but harsher also. It is great for light travel and fine for video fill, but for big light I have several options including removing the diffusers and shooting into a wall or ceiling, placing a 60cm 5-in-1 in front of it, maybe adding some diffusion cloth.

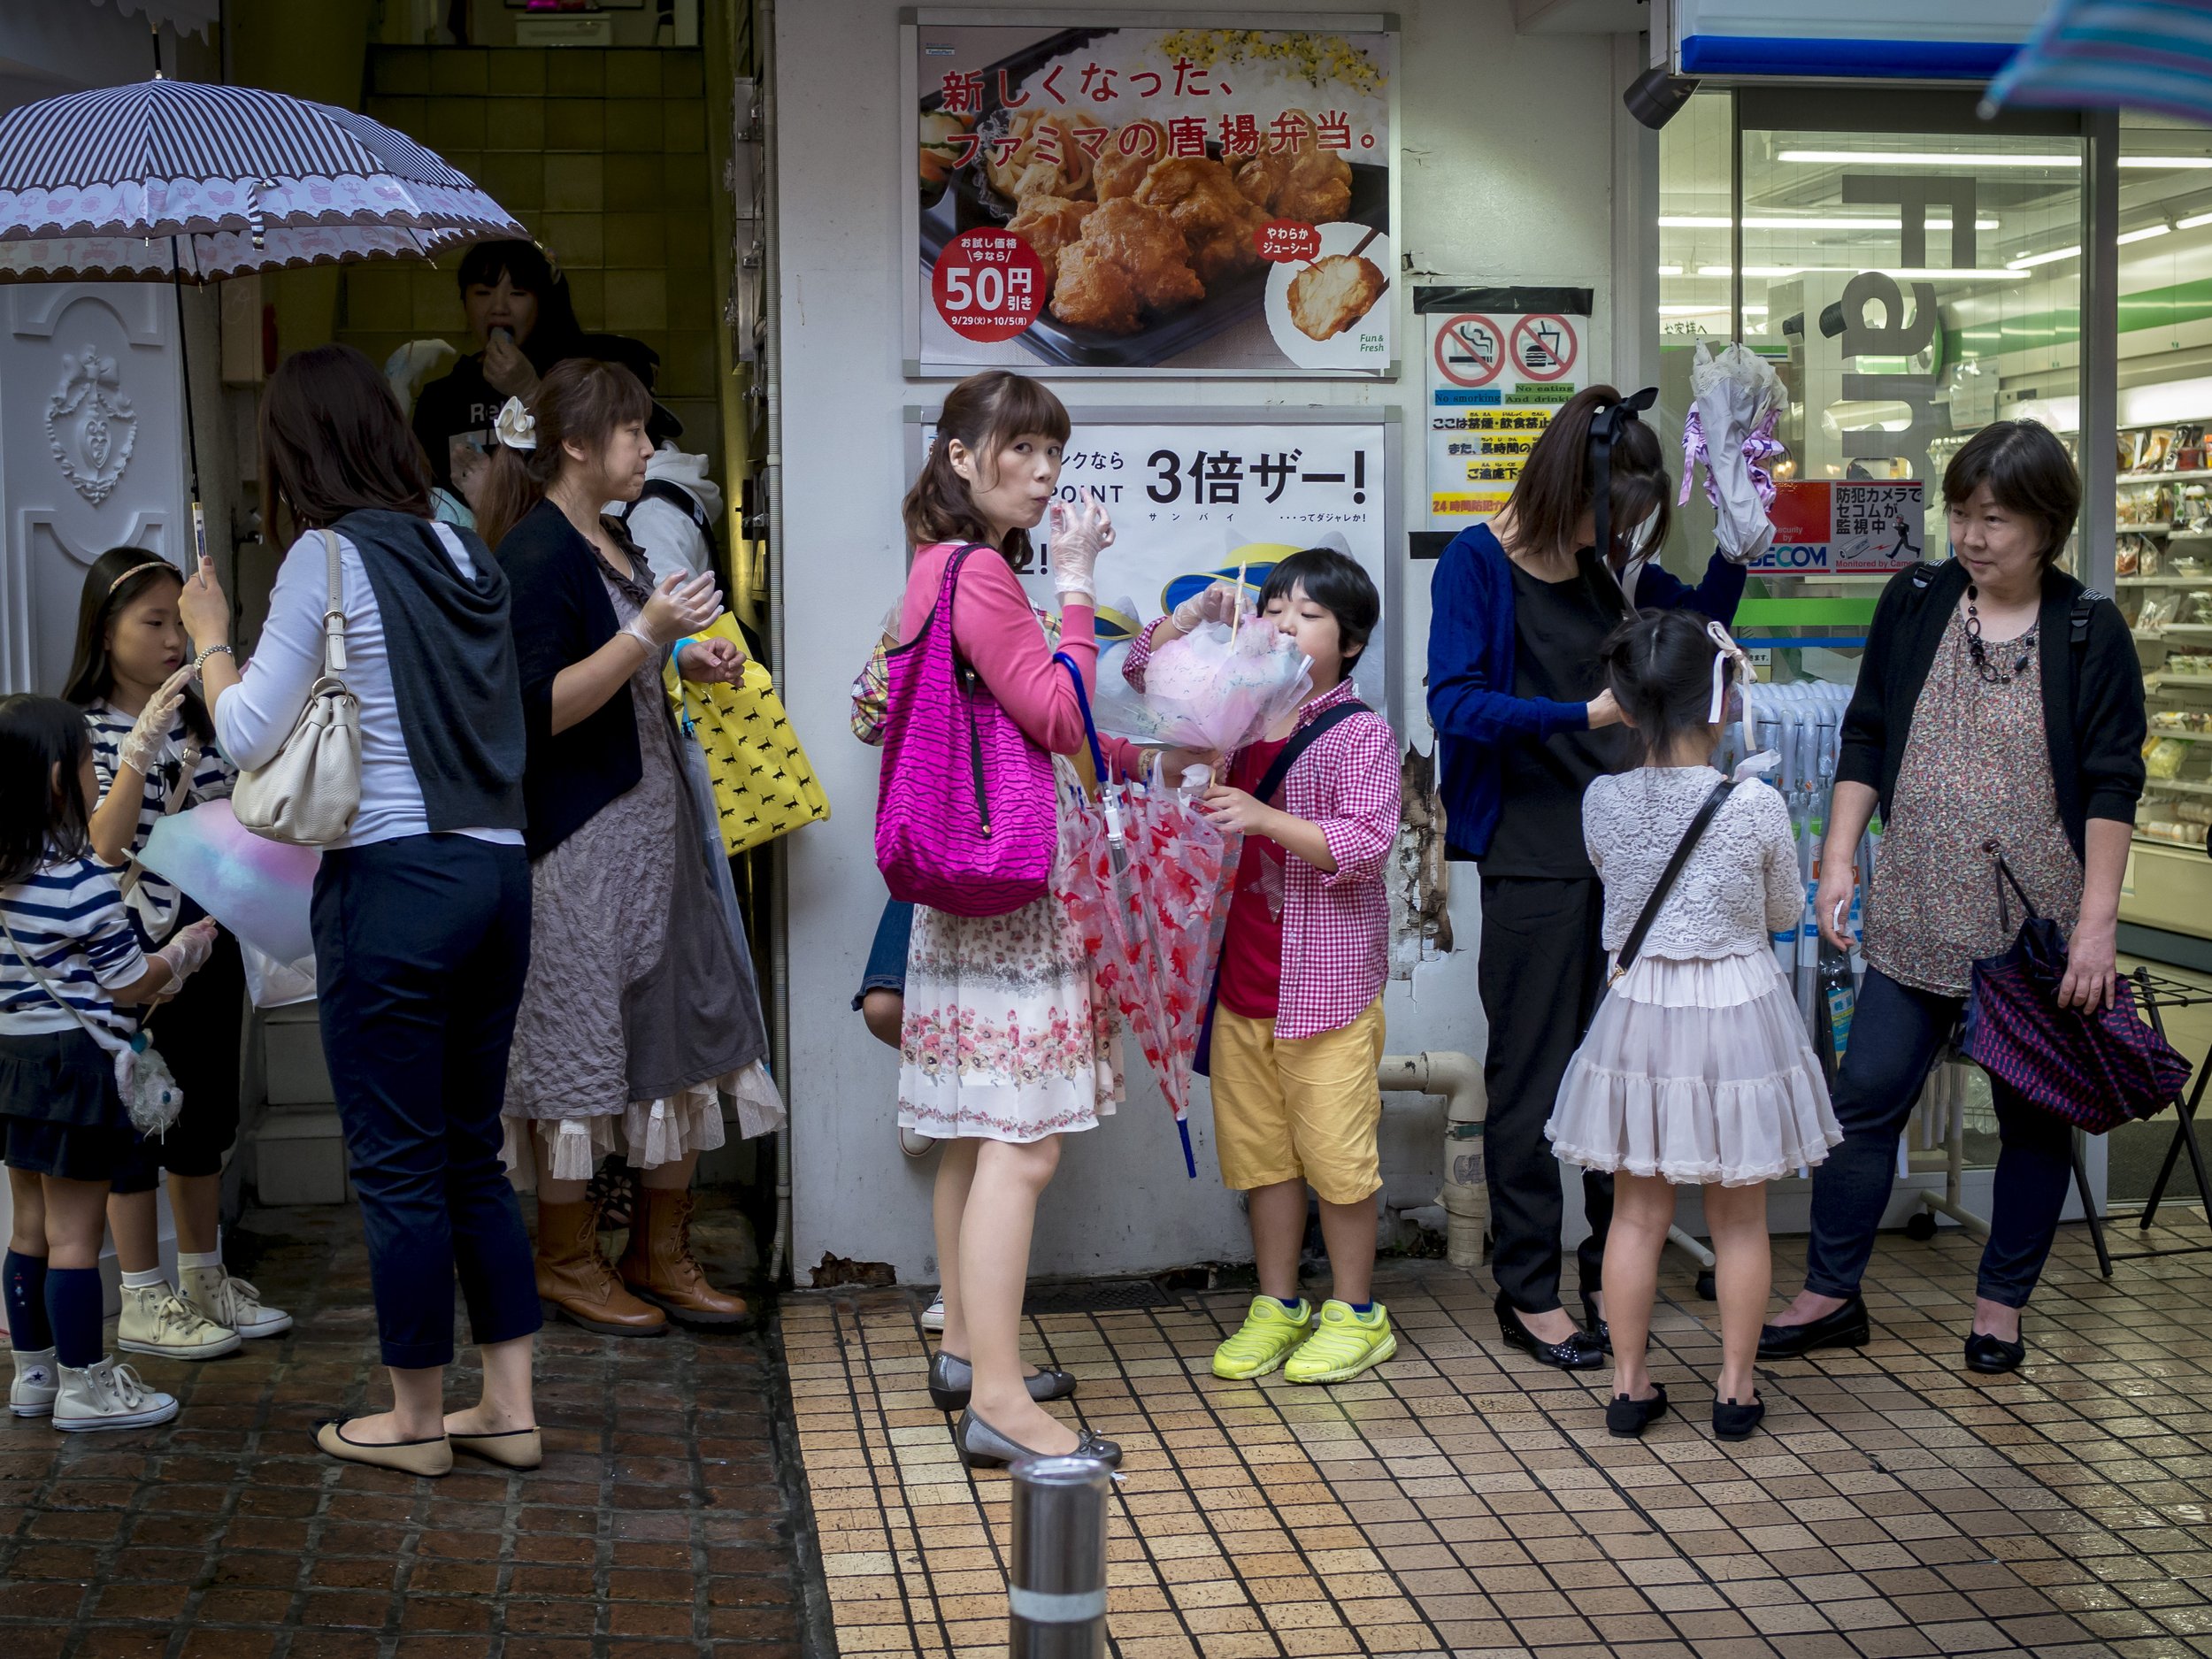
This is the softness from a reversed brolly. These are Godox and slightly warm white, which I find suits balls and other events well. The backdrop looks closer to it’s most desired colour here, catching more spill. I much prefer a slightly textured look than a block colour, but if needed, I have my Manfrotto solid grey, which can produce most colours.

I found a great video by Gavin Hoey (after I shopped!) https://www.youtube.com/watch?v=tIy7_dKZv-Q&t=36s and his recommendation is to go stretchy fabric. This allows you to stretch creases out with clamps and then looks like seamless paper, but without the hassle. I think this makes the most sense for block and vibrant colours, so my next buy may be red, yellow, lime green and orange in these colours. He also had some other cool uses for soft fabrics.

My whole setup is pretty simple.

I use a pair of the Neewer 2.4m stainless steel stands (that do not fit in that case), a pair of Smallrig super clamps holding a 1.8m curtain rail with a bunch of cheap “A” clamps. The whole lot (if you ignore my Manfrotto set-up**) came in at about $150 to start with and about another $200 in fabric so far for seven types and more coming.

*CAMS actually stands for “carry all my stuff”.

**Two backdrops and the magnetic bracket for about $700au

The $350 Manfrotto is nice, but so is the $25 cloth.

Flash And The (Other) Exposure Triangle.

The Exposure Triangle is the bedrock of photographic exposure.

All images, no matter what they are take with have these three elements in balance to get the desired exposure.

Light passes through a hole (the Aperture), for a period of time (the Shutter Speed) into a photo sensitive surface (which has an ISO or light sensitivity rating) to create a captured image. This may be film, a coated surface or a digital sensor, but regardless, the process is the same.

Adjusting any or all of these three values is how we control the amount of light needed to expose the image properly. To adjust depth of field we use the Aperture (among other things), to capture motion blur we set shutter speed (depending on the speed of motion) and to control quality and light sensitivity we use the ISO setting (although this is up to other factors also and is getting less relevant).

Aperture

Shutter Speed ISO

Simple when you know it, applicable to most situations with a little adaption of thinking or terminology.

When you have determined the correct exposure, whether it is “perfect” or to your own creative tastes, changing any of these values requires changing at least one other to compensate.

If you want to open up the Aperture to make depth of field shallower, you will also be letting in more light (through a bigger opening), so you need to reduce light by either dropping the ISO value lower (less light sensitive) or increase the shutter speed (less exposure time) or a combination of the two.

Mastering these and their inter relationship is the core of photography theory.

Using flash is an exception, but when you get it, it is as easy to apply, possibly even easier.

The above triangle is still just as applicable for ambient exposure when using flash which is to say, to capture the amount of environmental light you want before the flash capture, but for the flash exposure itself, this is the new triangle;

Aperture

Flash Power ISO

Shutter speed has been replaced by flash power for a couple of reasons.

Shutter speed has an effect on flash in that it is often restricted to a maximum “flash sync” shutter speed otherwise the flash fire may not cover the whole sensor or film plane when it fires. High speed or “FP” flash can fix this but requires substantially more power and some flash and camera combinations cannot use it.

The second reason is, flash is substantially faster than camera shutter speed, anything up the 1/100,000th of a second. The camera shutter is like a snail compared to a bullet, so flash works effectively independently (except for the sync speed thing). Aperture and ISO still matter, because they are not speed dependent.

Changing the shutter speed will have effectively no effect on flash exposure, only background exposure levels.

Balance is key.

This is an ambient only exposure, using the room lights and no flash. The shutter speed is just fast enough to avoid subject blur at the distance shot with a wide angle lens.

Once you have your ambient setting sorted, choosing a shutter speed that gives you enough environmental light, but also fast enough to freeze ambient motion if needed, then you set your flash power to balance it’s own exposure, effectively like a second shutter speed for a second exposure requirement.

This is the same space with ambient light capturing the background and flash capturing the foreground. In this case the flash was fired upwards with most coming off the ceiling and some bounced forward off a white card to help even out the coverage. Notice that the background is warmer looking than the more daylight balanced flash lit area.

In this image, the background is deliberately under exposed because there is nothing of great interest except the background pin lights (the table to the right is only just visible).

A catch here can be adding in enough ambient light to see the important elements as wanted as the flash exposes the main subject, but not at too slow a shutter speed to capture it’s motion, which will result in ghosting of the subject (blurred motion around a sharp flash capture).

If your main subjects are in shadow, the shutter speed is not overly important as the flash “speed” is plenty to arrest movement. It is when you mix both flash and strong ambient light so they are fighting for the same subject that problems can arise.

This image avoids too much dance movement blur by capturing the foreground shadowed subjects. These would otherwise have little exposure so would have been black silhouettes. The dancers under the lights in front of these girls would be at risk of blur, because they are better lit naturally and the shutter speed was only 1/100th, not fast enough to freeze motion. The laser on the right looks a little blurred at this shutter speed.

For me, switching from TTL to manual gave me a stronger understanding and also more control over this space. TTL, effectively auto flash, has it’s uses, but manual is more reliable, more efficient and unlike the film era when you had to do mildly complicated math every exposure, it is as easy as turning a dial and getting a feel for the space.

I know I can walk into most rooms with a M43 camera set to ISO 800, 1/100th and f2.8 (depending on ambient light levels) with the flash set at 1/8th power* and I will be roughly right to go. Flash power may shift from 1/2 to 1/16th depending on other elements, but 1/8th seems a good average.

If using a fixed light on a stand (bounced brolly), it is almost always 1/16th power**, ISO 800, f2.8, 1/100th at my normal working distance (about 3mtrs).

If your camera settings are consistent, you only have to learn your flash output by eye and guestimation can be plenty close enough, especially if the ceiling is an even height and distances similar. I find that thanks to the clean nature of flash exposure, being about 1 stop under or 2 over does little harm, so shoot first, adjust, shoot again if needed.

Flash is a great tool and needs to be mastered if you want to be able to handle most situations at a professional level. It can seem daunting, but the reality is, it only takes an awareness of a few new variables, often easily controlled ones and with some experimentation you are quickly in a much better space.

I now find flash a safe place to play, not a mysterious beats with teeth.

*Godox 860 or 685 or **YN430 IV. I use the Godox for walk around with TTL as a safety net, the all manual YN’s for static setups, but either can do either.

Becoming Aware

My life has changed a lot lately.

No paper, more schools and volunteer stuff.

No paper means fewer daily jobs, less overall variety and to some extent, less importance attached to the work (depends on what matters to you I guess).

More schools means being generally more relaxed and “embedded”, with greater emotional connection and more time can be put into each job. I provide same day turn-around most of the time, but even that is rarely required and compared to 5-7 jobs turned around within an hour of being done, it is almost languid.

Volume is up, way up and use of that volume also. A real benefit is few if any captions are needed.

Video is in a slump, but that is mostly my doing and a bit disappointing after my recent investments. I pushed it front and centre at the paper, being the in-house champion for it against the general flow of apathy, even avoidance, something I have not been doing with the school.

I feel there is always good use for it, but others do not see that. If you do it, and I am finding this is often the case with video, you need to produce a complete package, then people will grab it happily, but unlike stills, just providing “bare” footage is pointless as most do not know what to do with it or even why.

Looking at the potential of other areas though, school balls are providing a chance to hone my studio lighting technique (looking at a brighter, cleaner more brilliant look like a portrait of Teddy Swims I came across recently https://indiewavves.com/musicblog/qanda-teddy-swims ).

Drama is very satisfying as is music, although video again is thin, something I need to fix. Life is easier without it and very little of my video kit is truly useless in a stills kit (sound gear mainly).

A surprise recently at a school performance, a genuine aerialist in the faculty.

My sport has gone from 10-20 varied events a month to nearly nothing, but I have plans here to approach local teams and just shoot for them for free, simply to keep my eye in. I have noticed that without practice, I need a couple of events to get back into my zone, so practice is key.

The second school is dominant in private school sport in the state’s north and mad for it being covered. This would have been a back-pager at the paper, just one of a hundred or so at the school, but the big difference is, few if any of the others would have been seen with the paper. It is entirely possible that the multiplying effects of the right people seeing more images relevant to themselves gives my shots more actual useful exposure than the odd shot in the paper with a mixed viewership.

My “awareness” refers to the reality that only now, five months into the year, am I really getting that my life is so much more satisfying and enjoyable than it was this time last year.

Last year I was finally part time again after waiting since Christmas for something to happen and had missed re-connecting with the school (again). I did pick up the second school, but juggling the two was not ideal.

I am even enjoying old hobbies again, looking to do projects with stills and video and my kit, which took a beating over the last two years has now settled into a safer, gentler life. My current kit with my current workload will likely be fine for the next five or more years with little added (out of necessity).

The reality is I have been reserving my EM1x’s for sport, my G9II, a clean G9I and both S5’s for video and pounding the two rougher EM1.2’s and G9I. Even the EM10.2 and old EM5’s get some work. My Pen F is largely unused as is the OSMO. I know I can function with minimal kit, but I can field that in several ways.

Some are showing some signs of stress, but nothing I cannot work around.

My Recent Past In Retrospect, Part 2

More pondering and more self assessment and even some much needed affirmation of my recent past a sa news photographer.

I have been looking at the paper more since leaving it than I ever did before. I also tended not to look at it while working there, just trying to keep my eye on the next job, not bask in the glow, or hide in the shadow of the last. Maybe I should have paid more attention.

Again, these images as a sample, taken from a folder from mid-late last year after fruitlessly chasing an image for a friend.

One of the realities of being a small town news paper photography is you are often creatively limited*. Not complaining, because it is a good training ground, but when you come from a more creative space, you are always aware of what could have been.

Larger paper shooters often have an allocated car with gear, more time, often work alone without a journalist keen be done and gone and can sometimes even specialise.

For us, if it does not fit into your bag, you leave it behind.

If the job and the subject are only loosely connected, you need to think outside of the box.

One job required a candle light vigil be previewed, but the only time the subject could be at the venue was midday and the sun was out bright and clear. I moved the subject to a shaded are, then under exposed. I had two light options.

A small LED, which proved to be too weak to make a dent in the forced gloom without pushing it into the frame.

A flash, with off camera capability, but it was harsh and hard to control. The answer was to bounce the flash off the journalist’s off-white shirt back (just out of frame left) with the flash held at arms length to reduce unwanted scatter. A little augmentation of the candle light and we have “twilight” at midday.

Telling a story is always important.

I underestimated this at first. Aware of the benefits of connected images, I decided early on that the paper was only interested “the one” image. The reality is though, if you are not trying to tell a story, you are not watching the subject deeply enough, trying to find an image outside of the most surface level treatment and if needed, as we later did with online galleries, you could not, obviously tell that story.

Getting the captain batting, a celebration after an important wicket and the pennant being awarded, are all good, but better together, along with a little human touch, it is a full story.

*I remember a cadet at the paper fresh from a trip to the national office for their “ride along” time telling us how a photographer on the mainland (Canberra Times) used a bunch of props, including 50 soccer balls and a princess dress, to shoot a women’s soccer player (royal family of an Arabic country). She wondered why we did not until we asked her how long they had to get the shot, how much did it cost, how much support was there and did they have to get another shot that day? She quickly realised we are not playing on the same field.

Bags, A Real Use Reality Check

Bags are a thing with me. So much so, I have an entire page dedicated to them.

My journey started back in the days when there were only a few brands, not many more good ideas and plenty of people making do with alternatives.

Domke was my bag of choice, the “Jeep” of bags. I tried others like Billingham, probably the Bentley by that comparison, maybe the Land Rover, Lowe Pro (the Toyota), Tamrac and Tenba, (Honda and Subaru?) and later, some of the new brands like Filson (the luxury Jeep?) Mind Shift/Think Tank, Crumpler and others I forget.

Plenty of good bags are available, but only to a limited extent. Even brands like Domke, that avoid fluff for the sake of it, evolve slowly from a strong base and last a cats lifetime, but still need to offer choices in size, shape and fabric to be of use. they sometimes even try to update their look.

I tend to select my gear, then my bag, often being forced to compromise when I do.

The bags themselves range from Domke classics to some more on-trend styles and quite a few non-camera bags.

Why all these bags and still the need for some not even designed for the job?

The problem is no bag, no matter how good, is the “one bag”. Looking at my own circumstances, I have a huge variety of daily kit needs, ranging from fully rigged video cams to a tiny one camera and two prime lens setup.

This is often the problem. Camera bag makers rarely think of anything else and often make unrealistic promises. I have seen very cleverly designed camera backpacks that will hold all types of kit, but have little room for anything else hiking related and tire of promised loads being impractical. Yes it can take three cameras and six lenses with accessories, but only when everything is packed away, lenses off, hoods reversed, not “at the ready”.

The reality is, I will use what ever works and sometimes what works is not designed for cameras specifically but are still well made and designed. Probably the reason Domke have been my favourite stems from their almost anti-camera bag design.

Many makers sort of fell into the market through other pursuits. Domke bags were designed by a photographer on the fly and made by a generic canvas gear maker off a rough sketch.

Like Jim Domke and those he was helping in the 1970’s sometimes I also use what ever I can lay my hands on.

So, my favourite camera bags that are not camera bags?

The 5.11 “Range Ready” bag is the best video bag I have and a steal at the $150au*. Video gear tends to stretch the friendship with camera bags. “Boxy” and “fully rigged” tend to be the terms often incompatible with specifically shaped camera bags.Video bags are available, but the price is ridiculous for a bag that is often at the simple (boxy) end of the scale.

My Tokyo Porter satchel, which seems to be only available from the Kyoto Tokyu Hands is another example. This is my favourite travel bag because it (1) is comfortable for extended use, (2) does not scream “camera bag”, (3) fits a good kit and stuff you may need or buy and (4) gives me easy access. Apart from that I like its looks and it seems decently weather resistant.

Another winner is the Filson Field Bag (medium-Otter green). This is not the Camera Field Bag version which I do also own, just the regular one and as dear as any decent camera bag. It is not as well designed for cameras, but it has many of the features of the one above, is fully weather proof and has a very deep top flap, which is often not desired in camera bags, except when it is.

It has no velcro, no button press clips, no clever designs, just old fashioned buckles (that rattle) and that hold on ok even when just pushed through, so I can move fast, even run with it, with little fear of anything jumping out.

A little no-name bag from Kobe bought at a street stall last trip in Japan. It holds a surprising amount, looks like nothing much and wears well. Perfect for a one camera, several lens M43 kit, it was used daily after purchase. Like a lot of good travel bags, it has a lot of thief confusing pockets, is easily accessed even when full and stuff just seems to disappear inside it.

The kit below plus a scarf, my passport, wallet, travel bits and pass key, phone, even a book all fit in dedicated pockets. The scarf adds a soft base and gear separator. I can also add a 9mm, 12-60 kit or similar with little effort.

I actually forgot I bought a lens along one day (45mm f1.8) because I put it in a previously undiscovered pocket when packing. Cursing my all too common forgetfulness all day, I panicked when I got back and still could not find it until I again found the pocket under the flap, behind the other pocket.

I can run with this bag without cinching the straps and nothing flies out thanks to the magnetic clip and shape. No other bag I currently have allows this except the Filson above.

These all get an insert of some type, but taking a tip from Domke, I lean towards thin walled and soft.

*Like most things, as soon as it gets the “camera bag” label the price goes through the roof. Thankfully there is not yet a “wedding day camera bag class” with a double premium.

A Revisit And Fresh Expansion Of My Horizons

When I left the paper and returned to the school, which were intertwined, the third option, the other school, was cut loose as a not compatible option.

After a term revisiting my old life, I am in the same place for better or worse. I have no contract, no security, no official place, just a vocal pledge, knowledge I am wanted and happy enough with that I guess.

At first the reality of my new-old circumstances hit hard. Back to where I started, only a commitment for a larger marketing budget funnelled my way. The school can (and does) bring in others as needed, for specialist tasks or even some old projects that need consistency.

Then I realised, the freedom that they have, goes both ways. I am a contractor (without a contract), not a signed-on staff member, so when the other school, not a competitor, a different financial base, got in touch to see if I was keen to do some small jobs, I thought, why not. I am never going to be wealthy doing this work, comfortable would be the dream, but even that is a stretch.

Having two similar, but unconnected employers could work.

Anyway, today some football, something this school is very strong at.


My Recent Past In Retrospect, Part 1

Life is very different around here at the moment. Beautiful sunny Autumn days have been the perfect back drop for my new found contentment and “perfect” life.

The main school is being supplemented by the old school giving me the odd job (no conflict, different dynamics), some sport through the state’s primary AFL and Cricket licensee and my volunteer agencies.

I needed to go back through my Examiner files looking for a football match to help out a school employee. Lots of images, lots of thoughts bubbling up.

I have been hard on myself in retrospect. I always felt the pressure of getting names and the needed shot out weighed the challenge of the images themselves and tended to shelve my happy self, letting a less open, more “on the job” side take over.

The relative freedom I feel with schools, the ability to just shoot and shoot, no captions needed, few limits in time or content and full support for me chasing my perfect images, is a far cry from my mindset at the paper.

It seems, in the early days at least, my efforts did net me the images I liked as well as the ones I needed, or maybe I ditched the ones that were frustratingly pointless and have forgotten.

Some examples of what was needed, what I did, what else I did and maybe a chance to go easier on myself. All of these examples come from a random period late last year in a one of the last folders I searched (fruitlessly), but before I became too locked into a negative spiral of self doubt*.

A swimming event (state school age club championships I think).

These are fun for the school, tougher for the paper. The need to identify the swimmers puts a bit of pressure on. Bobbing heads in a constant rotation of events does not always give you much time to work with.

The images can be tricky, but you soon learn to pick the right strokes. Butterfly is king, netting images like the ones below effortlessly.

Throw in the odd other angle for variety.

Breast stroke comes next, basically the same but without the drama.

The other strokes are generally time wasters, so a few as able, then go hunting for something different, try to tell a story and use the environment.

I spent about an hour at this even (too long really) at the start of a busy Saturday shift.

I remember enjoying the photography, especially beating the challenges of location, notorious for mediocre light and humid conditions, but the captioning still sits heavily. The process was, to shoot the running board (LED on the wall over my shoulder), which thankfully matched up with a well organised race and lane allocation system I had been given a copy of, then shoot the competitors, concentrating on the two local clubs (blue and white caps).

I submitted about twenty images, managed to get the needed podium shot of a local champion and felt generally lucky that the right events were on when I arrived and the meet was well organised.

The reality is, the podium shot will be used if relevant to the story, the best of the action shots, maybe a small gallery online, but only if a filler is needed.

It is not always this easy.

Netball can be tricky.

Poor light, the stop-start nature of the game, teams ranging from well named and numbered and often recognisable athletes, to school children swapping position bibs mid quarter with patchy or non existent team sheets and volunteered “overseer” parents or even staff who do not know all the players by sight, can make it less fun.

My one national grade game (rare in Launceston as we do not have a state team, just a team that drops in occassionally).

I learned very quickly with higher grade netball, you do not chase the ball, you stalk the player. With only seven per side, a strict time limit on ball possession, limited court access and quick hands, most players will see the ball each change of direction. Basically they will give you an in-and-out shot each, sometimes more and often contested.

Plan B is under the net or approaching action in attack, but these tend to be messy and repetative.

Add some down time or sideline shots and you are done.

One quarter should be enough, two if the game is top tier, but often you are just creating work for yourself. You do get a feel for when you have your half a dozen minimum.

In this type of environment you often do feel like the better images are lost as you have to shoot the player’s backs (with their names) straight after a decent contest, often breaking your rhythm.

In the other example above of a worst case scenario (still my most remembered horror story), I had to find out a name from a school friend in the crowd, who often had to google their correct spelling, then stalk that one player, then repeat.

I was covering two games on adjacent courts at the same time, so it became a matter of one team-one end, each quarter (the attacking team so they faced me). The journalist concerned, a cadet doing their sport rotation, decided instead to do a story on a coach they found late in the day doing their 40th carnival and only one action shot was ever used!

*To put this in context, I had plenty of support from most quarters at the paper, the sports and editorial journalist often become friends, but the photo pool was a split between cool distance and bored but supportive. I flew the flag for video content creation, much to the annoyance of others and tended to “over shoot”, which ironically meant that even after I left, a lot of my images were used to cover the JackJumpers basketball team who won the national title this year and for previews of footballers coming into the new season.

You're Going To Need A Bigger Bag ..................

With not as much video as I would hope to be doing, my full frame kit is getting pressed into service as a stills problem solver.

The problem?

Not sure really.

Probably finding a use for the gear is the main one ;).

There is a problem though, one I was always aware of, but it is amazing how limiting it is.

It is frikkin’ big.

The little guys are my favourite primes, the 17 and 45mm f1.8’s. The monsters behind are their full frame equivalents.

It is not the cameras that are the problem, these are all big enough regardless of format.

The lenses though are about three times the size.

Some context here.

Full frame has some small lenses, slim little pancake’s even, but they are few and far between and slow in aperture so the full frame advantage is effectively irrelevant (f1.8 in M43 = f3.4 in full frame for DOF, which is over two ISO settings advantage to get the same shot and most pancake lenses are f2.8). I simply do not see the benefit in trying to buy full frame kit-small. Too many pointless compromises for little benefit.

Weight is not always the issue either. The larger lenses above are all plastic bodies, so no real bother and I have plenty of heavier M43 lenses. My 75mm Olympus M43 lens is heavier than the full frame 85mm above.

The difference is in their effective focal length. You can carry a heavy M43 kit, but it will be effectively twice as long in reach as the full frame kit.

The issue is, and it cannot be fixed, the size of the sensor forces the lens barrels to be wider.

It seems I now have to use a bigger bag.

Is it worth it?

I was starting to use a slim Crumpler Muli, or even smaller Crumpler or Kata shoulder bags and even some non-camera bags, but the minute I need to take the full frame, I need two of my usual spots per lens. A bag that once took a camera with mounted lens in a decent sized space, now just takes a lens.

The Domke F7 has become the one again, but even it’s lens spaces are pushed.

It could take two bodies with mounted lenses, a third body on top with lens mounted, facing down into the lens slot, another two more lenses in other spots and that is just in the main compartment. All these are ready to go. Only height is an issue, so my 40-150 f2.8 cannot go in mounted on a camera and the 300 f4 basically does not comfortably fit.

My full frame Lumix kit also fits, but that is only two bodies, three primes and a kit zoom. No reach, not as much width.

The benefit is cleaner extreme ISO shooting (ISO 4000+), but how often is this really the case?

Endings

I remember several specific times in my photographic life, times when something changed, sometimes for the good, sometimes not.

One time I tend to see as a negative, but really it is just a time, not good or bad, was the very last edition of Camera and Darkroom magazine.

It snuck up on me, I think also the makers of the publication as a whole, because the magazine is normal, even publishing parts of series and I only remember which edition it was, short of going through the whole of my collection and proving it, because of the black cover, something that may have been a last minute rebellion to the decision.

The new owners of the publication, decided there was no need for it in their portfolio, so one minute a healthy and functioning organism, the next, gone, but not forgotten*.

I think there may have been a little note in the shrink wrap, possibly just a notification through the supplier, but either way, the end was here and it was a little sobering.

Another interesting article about printer Michael Karman, by Gordon Parks a favourite blogger now also out of the scene. Interesting how much perceptions have changed.

The articles were the usual. Good writing, in-depth stuff with an educated eye. The one that rankled, was the unfinished one about the inability to focus properly with modern enlarger devices and proof of such. This was by Ctein a recognised master printer, so no small thing. Being unfinished, I did think it may have been a cruel joke, but the reality is it was as innocent as all the rest. I was drifting away from darkroom work anyway, so the timing was irrelevant.

The cover image “Lella, Bretagne 1947” is haunting and a favourite, soured a little by its use as deliverer of bad news, but stunning none the less. I find the near perfect rendering of the woman in the background even more compelling than the main subject and what a revelation in this era of dramatic sharp-soft transitions.

Sobering to think this woman just survived the German occupation, WW2 and will still have to face a decade of hardship.

Times change and things come and go, but I think I was always a little disappointed the publication, always my favourite, just went. It actually changed the hold these had on me, a slight shifting of loyalties from “monthly words from on high” to a more coffee table art or technical book dynamic.

I guess maybe because individual publications are complete in their own right, not at the whim of long term support. I have always been suspicious of relying on anything long term, a product of mixed, but decent upbringing, but some thing I did hold onto.

This seems to have manifested itself into an obsessive need to collect something when I commit to it, just in case (of what?), something I am aware off, but still prefer to do than not.

*They still sell for a decent amount on eBay and there looks to be a Facebook page CameraanddarkroomRenn, by Tom Harrop the original creator.

New Capture 1, ON1 No Noise and ON1 Tack Sharp Software Comparison

Just a little look at a frame I shot today.

EM1 Mk2, 12-40 at 18mm, ISO 400 f2.8.

In tight with Capture 1, no adjustments.

Added sharpening, notice the bushes in the front planter and the rails.

Now the same file with no adjustments over to ON1 No Noise 2024 as a DNG, auto in-out. There is detail in the sign, but the colour has shifted.

Again the same file with no adjustments over to ON1 Tack Sharp 2024 as a DNG, auto in-out. This time, look at the detail in the planter box.Same or more detail overall, slightly lighter and again colour shifted.

Powerful tools, but we are now in the realm of needing to be aware of when to use them and when to stop.

For almost any uses, there is no reason to avoid the base file.

These were good light samples, but what if you turn up to an “available gloom” shoot without your fastest lenses?

ISO 6400 underexposed, G9 Mk1 12-40 wide open at f2.8, C1 to No Noise (TIFF), then C1 again. This was a bad file, not actually submitted but used as a worst case scenario experiment.

Same again, but a better file. Not horrible and repeatable. Processing was C1, slight lift, then some Dehaze, over to No Noise, back and some colour added back in.

I guess the questions that needs to be asked are;

  • At what point is enough enough?

  • What price are we willing to pay for ultimate sharpness and noiseless-ness?

  • Are we starting to demand too much and accept a change in perceived quality to get it?

It is nice to have the ability to clean up noise and add sharpness to an image that has obvious blurring, but this needs to be used with restraint. The base settings for both these ON1 programmes are set to maximum, which is too much.

We are entering a new age of software power, something similar to the Photoshop emergence of last century, but we do need to remember to keep things natural and accept levels of perfection in balance with artistic quality.

Beginner Mind Applied To A Video Block

Luc Forsyth does good videos on productivity, your journey, sage advice and the common things that block progress. Many do, but I find Luc and Mark Bone seem to cut to the point and define the process better and more relevantly than most (and have the work to back it up).

Spurred into action today to address the video block I am feeling and to make sure I am ready to go at short notice (possibly my own notice as inspiration hits).

I have;

A full frame kit built around the S5, using manual cine lenses and series audio gear. This was a sound buy and a bargain throughout, especially the lenses.

A second full frame kit built around the S5II with Lumix-S primes and the kit zoom for full frame hybrid work. Basically a self justifying kit. Bought the lenses, bought the camera to make them work at their best. All excess really.

A M43 kit built around the G9II, with a G9I as backup, designed to be my “movement” specialists with a 12-60 Leica and some M43 primes. The M43 route would have been fine and this is a good example of that, but timing sucked.

In the cine lens kit, there are also a pair of M43 lenses to match their operation and look.

There is a premium audio kit designed to record people, events and spaces, a Zoom based audio kit as a portable problem solver, the premium shotgun mic (MKE-600), it’s capable little brother, the any-kit mic (MKE-400) and a LAV set.

So, why then when I want to go and video something, as well as shoot it with stills, I tend to fall back on a battered G9I and the MKE-400, because I know them and they are with me.

Problem;

Too much gear segregated into specialist spaces, all requiring their own bags or cases, which in turn need a trolley to move. This tends to split jobs into (1) full video press-take everything at the expense of a stills kit or (2) possibly some light video, take some just in case, but only what fits in my day bag (see above).

I tend to pack things well and neatly, then they just sit.

The reality is for me, video comes in three shapes.

  1. On the spot grabs because something presents itself, usually during a stills job. This needs rudimentary sound, but proper technique, so a ND filter, shotgun mic or Zoom recorder and a “proper” video camera (at least G9I).

  2. Event video, that requires better-dedicated technique, cameras and attention to sound, which may vary, but must be at least better than ok.

  3. An interview situation that needs lights and modifiers, multiple cameras, excellent sound with possibly out of the box solutions.

There is another, but I am not there yet;

4. Making a short film or documentary project etc.

Number 1 is sorted as easily as a few bits added to my day bag. This was my newspaper kit and it worked fine.

Number 2 is the most common dynamic and the one I feel I am just not prepared for. I currently have the G9II and the S5II in a roller case, with all their lenses, some cables, rigging bits (handles), filters.

This however still needs everything else, so another bag the 5.11, is loaded with the rest like, monitors, mat boxes, filters, rails, cabling etc. Still more bags and cases for each other field like sound and lighting.

As needed, the kit takes shape each job, but there is no clear kit and it shows when in the field with frustration, poor returns and a lack of creative clarity.

I had it with the paper, because it was limited, but now I want better results with a similar dynamic.

The solution;

Concentrate on a kit that will work, using the most practical and efficient combinations, ignore the rest until needed. basically act like I have not bought anything yet, just work with what I do have.

Beginner mind.

Bag first.

A backpack, so I can carry it with a shoulder bag for stills if needed, even ignore it back there if not needed.

The Lowe Pro ProTactic 350 AW, a bag I dislike, but low and behold it actually seems to fit this kit better than most other tasks it has been given and it is rugged. It also has the advantage of being accessible through four panels.

Camera.

The G9II, because it is my best all-round video solution, my best mover, focuser and has the highest bit rate and codec choices.

Memory.

A 1 TB SSD and a few cards as backup.

Lenses.

The Leica 12-60 because for the G9II, it seems the best fit. AF is smoothest, the stabiliser is lens assisted, the range is good and it is sharp and contrasty, but with that Leica magic so not too “contemporary”. I have the camera set to linear focus and 240 degrees.

The Sirui 24 Night Walker is next. This is a cine lens “lite”, with gorgeous handling and is my fastest lens at T1.2 (f1.1). The throw is shorter than the 7Artisan cine lenses, so it does not need a focus assist. There may be a 16mm added to this when it is released or an Anamorphic 24mm.

I also threw in a 45mm Olympus, because I have one spare, but that is very much optional as the 24 with electronic teleconverter does this fine.

Filters.

Filters are currently two sets, one for 62mm (the zoom), one 67 ND for the Sirui. I have more 67mm filters for the Pana kit, but these may find their way to this kit.

Sound.

This is not a priority for this kit, more about capturing action and places, but the MKE-400 is proven with the Holland M1 Larks as backup. I will likely add the Zoom H1n as an area recorder, for close, closer and wide. If I know I will need it, the MKE-600 can go in.

Rigging.

The G9II is more and more becoming a de-rigged camera which is part of the secret of this kit working, but there is a need for something.

It has a Black Mamba cage and a rail set with clamp for the SSD, a chest pad and a standard Neewer tripod attachment plate. I have added a top handle, but so far not used it.

I have another of these and the ability to extend it for a shoulder pad, but I am keeping it simple for now.

Lighting.

Not much, just the little Andoer led panel. The Amaran 60D and Weelite RB9 are both easily added, but like everything else, not part of the base kit. Lighting is not the point of this, it is the “as I find it” video kit.

Power.

This is the bit I was stressing a little, but the reality is, without a monitor* or complicated mics, this kit will be used for moving shoots, not long static recordings.

The Zoom kit uses a couple of small battery packs, the larger sound kit has full power packs.

Add some cables, spare cards and batteries and set to go. The SSD is on a flip out clamp, so I can mount the camera.

This bag regularly annoys me. It always seems to hold less than smaller, simpler bags as well as the main zip sticks and it is uncomfortable to wear. It does however, seem to like this kit.

The rest is now the interview or serious project kit in several bags and cases. I will deal with that as needed.

If sound is an issue, the Zoom kit can be added, with a 10ft cable in the backpack to enable it.

*The monitor thing is interesting. With a monitor I lose touch auto-focus and still have some difficulty with manual focus. I think I would be an eye piece manual focus user if I have the option, so that is often what I do, just put the camera to the eye.

Concentrate On Your Subject, Not The Process.

This is for me, but you can join in.

Process is a funny thing.

After shooting stills after thirty odd years, I don’t think much about the process, it just happens. Even if I take a decent break, there is little to no awareness of getting back in the swing, but I know I get more efficient the more I do. Process happens, it just does.

Select lens, aperture, check shutter speed and ISO, compose and shoot, re-compose-shoot and so on. Instinct and practice, not thought.

Video is new.

The processes, although coming surprisingly comfortably, are still new. This means I tend to dwell on process, spend too much time thinking about a to-do list of work methods or “shapes” to try and techniques to attempt.

“Fashion Victims”, Tokyo 2017

I need to be able to “see” things organically and be able to react. At the moment there is much planning, which is fine, but the planning is over-riding my reflexes.

There is probably not a more certain way of curtailing creativity than concentrating on process. Creativity should bloom in a garden empowered by process, but the garden needs to move out of the way to allow the blooms to take shape.

If you push through and repeat over and over, eventually you get muscle memory freeing up your productivity, but that takes a while and productivity is not necessarily creativity.

I, in an effort to grow my video “chops”, will do this;

Concentrate on the subject.

Subject is all, the rest comes.

It is what it is, you just need to see it.

I concentrate on subject first with my stills, melding my personal view with my perceptions of the thing itself. I come to it with the practiced confidence of someone who has dedicated a lifetime to wanting to then practicing over and over.

Let a little obsession in, it helps.

Ironically the first step is get your processes in order. Make them invisible, effortless.

If you keep it simple, make sure you are organised and basically get your Sh#t together, then you can concentrate on the subject.

All you have to do is make sure you have all you need to get the job done, but no so much you are paralysed by choice.

Yeah simple ;).

My advice to myself is to keep the camera and lens combinations simple and fixed.

Work with what I have with light and angles, only meddling with extra stuff when I have to and “take it as is” is exhausted. Basically let the story tell itself, let the subject control the space and work as sympathetically with it as I can. Don’t push myself on it, let it show me what it has when it wants to.

“Space Invaders”, Kyoto 2019

Over eight trips to Japan, one lens, the little 17mm f1.8 Olympus has done the Lions share of the work. Plenty of lenses have been lugged over there, cameras to, but at the end of the day, I can show a strong body of work taken with the 17mm and any one of a several cameras.

Breaking it down to more practical language, make a shopping list of what makes up the subject. Who or what are they, what are they about. Challenge yourself to summorise the story in front of you as succinctly as you can.

The other advantage of this is you tend to shun short term fashions and gimmicks, becasue these are process based.

My hope is, I will naturally develope compostions and movements just like I do with stills. Organically and fluidly, I just need to stop thinking about it.

Again, Who Cares?

The AI thing is hot at the moment and I have paid into the argument, but at the end of the day, who cares?

An image is an image, whereever it comes from.

From the makers perspective relevance and income are at peril, which is up to us to work through, but from the viewers perspective, being dished up infinite “perfect” images will grow tiresome and we will disengage.

People come in all shapes and sizes, but I wonder what “perfection” AI would make in the place of this image and would it be relevant anyway?

Like many things in our world, we perfect and perfect until anything less than perfection is unacceptable, then rediscover authenticity with all its imperfections as the “new-old” thing. Just look at the younger generation’s love of film photography and all its limitations for a prime example of searching for that missing something.

Character comes from imperfections.

Character makes things special.

A bit like Dolly the sheep, fear of the sky falling in after successful cloning came with the realisation that another life is just another life. Most of us can do it with surprisingly little effort. Your clone will not be you, just look like you and possibly have even less connection than a twin would.

Is it right?

Is it part of the universes grand plan?

Does it matter?

It, like most things comes down to what we do with it. Cloning a copy of ourselves to harvest for parts, replace an individual without their consent, falsify someone’s location or compromise their role are the stuff of science fiction and what can go wrong has been covered by Hollywood and literature multitudes of times.

Like our twisting of religion for our own purposes, it is us, not the thing itself that goes wrong.

AI is much the same. If AI makes trusting the news impossible, then we will change our habits of communication or simply not trust anymore. We reap what we sow.

If fear of things not being authentic is an issue, then being there will be the only fix (except for cloning of course…..).

AI is good and bad in equal measure, but not the real enemy.

On one hand it is a powerful tool that will save people time, money and effort, fuel inspiration, make right things that refuse to happen otherwise and empower everyone to a similar level.

On the other hand it will make many people creatively lazy, cover up a lack of imagination, make entire career paths irrelevant, possibly kill our adventurous spirit and need for genuine self expression and our awareness of that.

In the neutral corner, it will shift the creative base of many fields, leave some as they are and make much of what once made us excited, simply mundane.

It is just a step in the journey and there will be more.

Authenticity, reality, human history will matter, the background may change, but the people won’t.

My job is to document real people in real places. That role may evolve, but real people and real places will hopefully still matter. Technology is moving ahead in different ways, but overall, only at the pace of the slowest element and that is increasingly us.

What is done with the images and video I make will definitely change, the role of the graphic designer possibly evaporate as it gets easier and less specialised, which I find quite ironic as my own path to full time work has constantly been stifled by not being a graphic designer, only a content creator.

No generation has been immune to change, this one seemingly at a higher speed than previously, or is the speed of change just part of that change?

Morning Walk

I did something I have not done in a while. Take a camera with me while doing just everyday life things.

My weapon of choice was the OM10 mk2 and 12-60 Lumix kit. Both solid performers and a good match.

Arriving at our normal holiday walk destination, the local dog park, I scratched a long term itch, getting this forgotten place. Normally the graffiti in the background is in shadow, but I got lucky with some reflected morning light bouncing back onto it. A quarter of an hour thing at best.

Just along a bit and the bull-rushes are at that mid decay stage.

From there, the walk takes you through a lane surrounded by swamp on either side. With a dog dragging me, slippery footing and low light, I pushed it a little, getting about half sharp, but always got a shot.

Once in the park, views of the swamp and river are plentiful. Including the fence line shows the grasses still stuck to the wire from floods a couple of years a go. Hard to imaging the river was over my head at this point (it covered the road bridge in the top shot). We have had some weather down here over the year. About five years ago, two inches of snow fell for the first time in fifty years, breaking or bending many of the Tea trees.

Backlit mist, river, trees. All you need.

This gum has also been haunting me (joke; it’s possibly a “Ghost” Gum)

Second lap, about 650m each one and the mist was hanging on.

Then my girls going back to the car. Lucy on the left is my companion, always a bit tricky early on as the GSP half of her wants to hunt. Much calmer on the way back. Meg and Daisy walk down separately to take her “edge” off (Daisy’s that is).

Maybe the start of a good habit?

Hope so.

Shoshin, Or Beginner Mind And Honesty

David Vestal in one of his columns in “Photo Techniques” magazine talked about teaching two classes, one a first year introductory and the other a third year “advanced” class.

In his words the first year class was better in most ways other than technical proficiency. The third years had already started to fall into rigid and uninspired habits and thought they had it all sorted out.

Ok, I have been doing this for thirty plus years.

Is that thirty years of the same thing re-invented or thirty years of growth?

Probably a blend of the two, I do try to grow and experiment, but I also have a strong understanding of the “rules” of photography and video……… .

Are those rules keeping me from growing?

For example, I hate “reels” and think they are an abomination created only to suit lazy content creators and reward poor phone/camera design and a lack of awareness, much the same as their habit of holding their LAV mics.

Few images look better vertical than horizontal and video should never be subjected to it. It actually fights the reality of evolution. Our eyes are side by side not stacked, it’s a fact.

As proof, when TV and cinema screens got horizontally wider, people became more comfortable looking at recorded content, feeling it was now presented in a more “natural” way.

Am I wrong?

People want them, so they must be something I guess?

I like square images also seeing them as the other true format, so where does that fit in. Are square photos actually “half reels”?

When presented with a mental block or problem that defies solving, the Japanese have a word “Shoshin”, which means “beginner” or “initial” mind. A “child mind” is also used.

This means to literally rewind to the start, the true start and think the problem through with a fresh palette. Easier said than done. Almost instantly, pre-conceptions can taint this freshness.

How do we achieve this “child mind”?

Absolute and utter honesty, a genuine desire to let go and a thirst for clear and strong growth over all pre-conceptions.

Easy……………. :).

Something that does become apparent with this clear thinking, is that reality, clarity and honesty also apply to the subject matter and reasons for creating your art in the first place.

Who are you making it for?

Important question that and I will not supply the answer.

Subject always trumps gimmick. Often when looking at the work of a creative influencer, I subconsciously categorise them into “for trend” or “for subject” classes. I don’t mean to, but it happens.

Like all things, you can often time stamp any creative endeavour by it’s “look”, but the work that transcends these artificial classifications has a depth of honesty and integrity that cannot be pidgeon-holed. People often copy the work of the first trail blazers and are damned by the act.

If you can cut through the white noise of fashion, things like technical improvements, trends and the need to own them, these worries tend to evaporate.

Once fuelled by the need to create the perfect street image, i am now repulsed by some of my favourites. This file, probably my most intimate is an intrusion, a violation even. Did I get into the person’s life and share their world with the viewer? Possibly, but it was theft, not true sharing. Clever is often a street photography corner stone, but it is not a noble boast.

I once would have labeled the gallery below as “postcard grade dross” first to “intimate connection” last, but now it might be more like “safe and gentle” to “intrusive and selfish”.

Phtotography is by definition a recording device. Rcords must be taken, but the process need not be cold and artificial.

Cameras are always getting better and always will be. Software is improving, viewing platforms also, but at the end of the day, the technically challenged, almost two hundred year old images of the American Civil War battlefield dead taken by Mathew Brady are as real and visceral as any taken since.

Ask yourself when taking an image, are you taking it of or for the subject. Are you taking or giving, stealing or sharing? Is the process two-way or one-way only?

If you can honestly say you are connecting and sharing the event with your subject, even an inanimate object by observation, then your images should show that.

If not, they better be “on trend” and better than most to stand even a small chance of staying around for a while.


Retrospectives And Origins

I found my stash of old photo magazines the other day.

I knew I had them, I even knew where, but had little interest in digging them up, their usefulness questioned in this period of my digital life, but their sense of preciousness still powerful up to three decades later.

Some of these came at a lull in my photographic journey between film and digital, the odd magazine being the only tentative connection.

Each month the wait would start over with Outdoor Photographer, Camera and Darkroom, Darkroom and Creative Camera Techniques (mouthful) later becoming Photo Techniques, Black and White Photographer from the U.K. and others. I have about 100 of them left over from probably 1000 total (and I had other hobbies). The price of some of these was $9.50au in 1995! That would be at least $30 now.

Needing something other than a phone to read at the local coffee shop (next door as it goes), I grabbed a couple randomly while cleaning up, more curious and keen to break the digital zombie habit than anything.

The images reproduced are selected at random, based on the half dozen mags on top of the pile.

The waitress gave me a quizzical look as I sat there, thirty year old mags before me and I may have raised an eyebrow when some articles made me chortle out loud. I am not being dismissive of the content, on the contrary.

She did comment “that’s nice”, but I am not sure if she was talking about the picture, the subject matter, the magazine, the fact I was reading an old magazine and not looking at a phone. Any will do I guess.

The articles were often very technically dated, but some, many even, were prescient in their thinking, almost uncannily so. Many accurate hints and theories were posed about things they did not even have terms for then. Nobody knew what a smart phone was, the web was young, slow and mostly innocent, the kilobyte ruled and many got pixels and pixies mixed up.

Sad I guess that sometimes the people with the foresight and smarts to see clearly into the future can only be appreciated in hindsight, but I guess that’s life (talk to any parent).

Some take aways;

A lot has happened in over twenty years. The ads alone tell a story of enlarger, film and silver paper dominance. Digital is there, but a mysterious curiosity, mostly viewed with reserved distance, even dismissed by some. There are advocates of the process, but they are the “tech geeks”, but not something I had any interest in at the time*.

The camera adds tended to promise something next level as the slow creep of technology started to enable shooters.

Rarely seen in Outddor Photographer that mostly dealt with colour slide film users, the other mags are held up by a pillar or all things darkroom. I had three of the Meopta units, one 35mm colour mostly used as a mono diffuser, a 35mm mono condenser (sharper) and a medium format diffuser (more forgiving) with Schneider or Nikon lenses. A friend and “wise old head” liked these because they were solid Czech designs and once he trued them up they would not shift. All it brings back for me is a dark, hot, smelly darkroom and the eternal enemy dust, with the occasional success.

Tripods were a mandatory tool and big was the only type, camera bags were rudimentary with limited in choice (but always sufficient), Nikon and Canon seemed unassailable, photography was hard, but always seemed worth the effort.

As you learned it just got better and easier, without a constant changing of the rules.

The one area that seems to be more accepted in digital was Photoshop re-touching and colour Printing, both mysterious art forms in their own right in wet process photography, so digital actually seemed easier. Digital printing is ironically easily accepted with a film shooters eye, as the limited quality and added control and creativity fits well into a film printers thinking.

An ad for a Minolta scanner, I seem to remember Nikon and Minolta were the brands to get. People could and did retouch prints back then, but it came under the heading of painting.

Neg scanning was seen by many as still the better digital path, but that won’t last long. One of Kodak’s many miss-steps at this time was helping develop the digital sensor at odds with their own film and paper business. Who knew……. .

One mag, Nov/Dec 2000 Photo Techniques had a “Top 25 Cameras” article. I won’t go into all of them, but a large format film camera tops the list, a Leica M6 is next, then on through the full gamut of film cameras from medium format Mamiyas, Minolta Maxxum 9 which is the highest rated “new tech” 35mm cam, the Canon EOS 1n (not D) comes in at 10, more film cams of all formats, mostly larger formats, some Contax, more Leica, a Pentax and Bronica, some Olympus one classic, one modern, the little Nikon 28Ti that I owned.

Film cameras still dominated thanks to a stubborn U.S. market and possibly the threat of the “Millennium Bug” sewing mistrust of all things computer.

Next we hit a separate sub-division for digital, which is tackled more as systems and concepts than specific cameras.

The Kodak 500 and 600 series “upgraded” Nikon and Canon cams to digital ecosphere, but the Nikon D1 and Coolpix 990, Minolta Dimage RD300 and Olympus C-3030 all make an appearance. It is sobering to think that massive amounts of money, time and energy were put into systems using tens of kilobytes of grunt, not megabytes, gigabytes or terabytes.

With often quaintly naive results, especially when compared to film work of the time it all seemed the realm of the newspaper or alternative artist. To me it was like looking at crayon drawings made by a mechanical hand and having to go oooh-aaah to suit the mood.

I was surprised how many larger format cameras made the list (over half) and that Minolta (later Sony) and Olympus had a decent presence. We wanted quality even at the cost of convenience and 35mm “full frame” was still seen as the baby of formats.

I am also amused by the two time lines I see.

All of the cameras considered old even at the time of printing like many of the Large format cameras, the Pentax LX, Nikon FM2, Olympus OM4Ti, models from Contax, Hasselblad etc seem no older to me now than then. Still valid, complete in their own way, perfectly capable of producing 100% of their promise as long as batteries (if needed) and film can be found.

Some spectacular glass and classic cameras. Still make me excited, even though I have had and relinquished some of these over the years. My wish list at the time would have been a pair of S2’s and a few primes. About the price of a new car.

It is the “front line” tech that looks dated. The Minolta Maxxum high tech wonders, the early Nikon and Canon AF cams, Olympus “bridge” cameras, anything digital. These plastic wunderkind are now ancient relics, the older cameras above are timeless classics that seem immune to times ravages. A friend uses a Nikon D1 as a door stop, in comic reference to it’s $14,000au price tag when bought.He likes to show young shooters his most expensive memory card, a 512mb CF card that cost close to $1k.

He now uses an FM2 made before it and still going strong.

I guess it is like comparing a 1960’s Mustang to a 1990’s Toyota.

The images and printing were sumptuous at the time in Camera and Darkroom, Darkroom and Creative Camera Techniques and Photo Techniques, bridging the gap between fine art and a premium technical manual. Outdoor Photographer, another favourite (I kept their annual competition issues) was less so, but still satisfying.

Film was at its height, digital looked crude, clumsy, expensive, complicated, soulless and dull, putting itself into a different, less artistic class all together. A courageous few could see the future, or thought they could anyway.

I was surprised by how dated the images look technically, much of it down to printing limits, but also feel a sense of sadness that the “quality” of the time and our appreciation of it, may be something we have lost. They did the best they could and it fell short of master work prints in a gallery, but it got you there, it transported you. Imagination is a wonderful thing, it was once the internet for most creatives.

Some images are jaw dropping on a visual level, but “soft and dreamy” on a technical one**.

What price perfection?

This is the type of image that would excite, but now seen as cute, maybe even flawed and hardly worth the effort.

The reality is, very few images in the magazines would pass the “perfection” tests we use these days, which is as much as anything the difference between print and screen viewing. Screens, even though they are ironically often small and lower resolution than we could use, do promote a feeling of back-lit clarity well beyond hard copy print. Better? No just more on trend at the moment.

Interviews with master printers like Bob Korn anda show case of their images were a favourite as they show cased the ultimate “end of the line” quality. Well printed and stored, these most likely still exist in all their true glory. The magazine could not reproduce the highlights of this image, but in the real print, they would be there.

Grain was a thing and it was beautiful.

The articles are mostly as philosophically relevant now as then, you just have to shift the technical terms. Some articles are the progenitor of our current thinking like the very first article about, with the western definition of, “Bokeh” (Photo Techniques May/June 1997), the dry wit of David Vestal, the eternal wisdom of old masters, many now gone, photographic rules that still hold true and above all life and all it’s pathways.

Should you shoot mono or colour, single frame or motor driven, large format or small, auto focus or manual? Is an image yours or does it belong to the subject, the time and place, or everyone? Harmless subjects, gentle even.

Sound wisdom, just flipped on its head now.

The problems of the past it seems are the same as now, just perceptions and the combatants change.

The images on the whole seem dated and it is easy to just dismiss them, but on further viewing two things come forward.

They were immeasurably harder to take, so even simple looking images need to be respected for what they were. A fleeting grab of a dancer in poor light with a mystical quality was not the result of saturation, but skill, preparedness, an acceptance of a high waste and cost ratio and often an intuition for what may be, not what can be shot from every angle and the results confirmed immediately.

The long exposure grab of a jetty at night was likely the result of dozens of attempts in cold and possibly dangerous conditions.

It was a time of specialists and obsessives.

Masterworks made with much love and effort, but possibly copied by an iPhone and printed on a home printer now.

Close focus, sharpness vs grain, low light action, lens design, shutter action, long exposure, dynamic range, film limits, ongoing cost***, manual focus vs early auto focus, print processes, film type/brand/S-curve/processing all contributed to the craft, but also it’s limitations. People overcame these limitations with ingenuity, perseverance and a little luck.

Sometimes people even tried to use 35mm for “fine art” level work. The nerve.

This guy shot the White House interior as an architectural photographer with 35mm Kodachrome in 1961! The images above were later work, but basically little had changed.

The second thing is, they were the first.

These images are often either the first of their type by process or by subject matter. We were still exploring, peoples being discovered, places seen for the first time and many of the names I later purchased books of, I first became aware of here.

Most of my larger knowledge came to me through these pages. Always learning and evolving, I could have done worse as a first launchpad for my future, the technical stuff is inert, inflexible, rigid, but the philosophy I am now starting to understand better.

Lots of lessons there.

Respect.

I feel this exercise is different to someone doing the same in the 1990’s looking back at the printed matter of the 1960’s because not just technology has changed. I clearly remember at the start my photographic ambitions being much in line with those before me, the gear just a little newer (or not), but we all wanted the same things and we all had much the same tools.

I wanted to be a world travelling National Geographic photographer like Sam Abell or a landscape master like Michael Kenna or Ansel Adams, much like the generations before me.

Images like these make the world a richer place by existing. The magazines helped give them thirty more years of life in my world and in a very small way, this post is giving some 30 more.

Some are just down right haunting and I doubt could or would be taken like this now.

Since the 2000’s not only has photography changed technically at an ever faster rate, but society and how we see images has changed even more extremely if that is possible. Doing what the last generation did is pointless, even though the retro movement is keeping the old alive longer.

I struggle to define anything photographic these days, because it is all changing so fast. Like fashion, a decades worth of evolution is now a half season flash of retro driven inspiration. Definition it seems is lusted after in modern content creation, just not defining the process itself.

What is gone is gone, which is the burden of those who appreciated it and are lucky enough to be able to remember. What is to come is exciting, but always tempered with that realisation and the future is never immune from the influences of the past.

I consider myself lucky to have experienced photography at its zenith and continue to.

*

I was going to throw these out or gift them, but I think there is still some validity to occasionally perusing them, just as a reminder of things gone that were once highly appreciated and maybe should still be kept in my minds “image bank” to draw from.


*My first digital camera was a third hand EOS 10D and my first computer was bought solely to run Lightroom 2 I think, so I am dating my digital start to about 2009-ish. I had barely even sent an email at that point and I think I am only now approaching the half way point between my film and digital careers. It seems an eternity ago.

**It seems you need to shoot video to want that still.

***It used to be a long term and considered process buying gear, then ongoing running costs, now the industry has successfully trained us to update gear regularly, because actually doing it is effectively free.

AI Is A Selfish Beast

Got your attention?

I have been reading some of my favourite old Camera and Darkroom magazines lately found while cleaning out my garage. These date from the early 1990’s to mid 2000’s and were at the time the height of technical and artistic discourse in all things photographic.

There are amusing bits, like the old computer tech talking in kilobytes m=not gigabytes and some of the chrystal ball assumptions are way off, but some are surprisingly prescient.

The meat of the matter though are the articles and interviews featuring masters current at the time or passed. Many of these I did not bother with at the time unless the images grabbed me. A shallow skimmer, I tended to devour repeatedly some articles and shun others that were not “my style”. These were often European masters, often older works and sometimes confronting.

As I said, shallow.

Revisiting some of these has stimulated my thought processes, fuelled some strong ideas and opinions.

As an example, one interview of French photographer Willy Ronis revealed to me the sort of wisdom I like to spout, but his is from someone better qualified.

The first was the ownership of an image. In his words “You have to have the right”. In his view the relative machine gun-like image taking of a motor driven film camera takes away that right (I do wonder what he and others would think of modern digital with 60fps and effectively unlimited files). Your image, your timing, your perceptions, your custodianship, or you should walk away.

He never posed an image, only recognised one and all of his images were taken with instinct not overt control.

The second gave me a realiseation that is obvious to all, but one that time has dulled I guess.

When asked about colour and black and white he said he has gone back to mono because “I can master the process”. “In black and white if you make a little technical mistake you can correct it. In colour, without the use of computers it is impossible”*.

When I started in this ever changing space, you shot colour for accuracy to eye, black and white for artistry or to scratch the hobby itch. There were plenty of exceptions, but for most, nearly all practitioners, black and white provided near instant shoot > process > print to your preference any day, any time at your own pace. I remember many times testing gear and shooting a roll, processing, assessing, going again and again in the same day.

Like a RAW image, there were many steps of control you could exercise, some capable of salvaging the worst mistakes, all requiring some artistic commitment and there was a feeling of a “secret sauce” just around the corner.

Colour was more shoot > hand it over to another to process, taking an hour to a fortnight (slides) to get back > get them to print it, often to their eye unless you had a good custom printer or for slides, find a way of viewing it and very occasionally get an expensive print done. This was all about control up front, the. relinquishing control from then on.

Colour was a matter of accuracy when taking and controlled processes from then on. Slide films were the gold standard but slower to process and the end product was problematic, negative film was more flexible and forgiving, but considered amateurish. I guess colour is a little like the JPEG of today.

The point.

Controlling an image, especially a colour image is very much a computer thing. Ironically it is the once more flexible mono process that is now paying the price. Black and white is becoming the poor step child of the current regime with the natural limitations and feel of film making way for “film like” offerings, that are to be honest, often not film like.

With delusions of retaining a good film memory I process towards that, but I live also with the reality that this is not much like film at all. It does not have to be I guess, but film provided a good compass.

AI adds that last element which is to ditch the taking bit all together**.

AI is all about what the end user wants, with little if any regard for subject connection, even real subject existence. AI is the ultimate selfish beast, feeding the user seemingly what they want as they want it. It can make something, but will there be any creative point? At what point does the process become remote, basically a creative lie?

Looking at it all from the point of view of Ronis and his contemporaries, what is the point of doing it if you do not take ownership of all the process?

The commercial world will embrace the speed and ease of it all, hobbyists also, but for authenticity and to give the image some relevance, a reason for being, artistic creations will need to be more than just ideas created by a computer programme. If we cannot attribute emotional connections that go both ways, to our work then why do it at all?

These older photographers remind me of one truth that is timeless.

Anytime you involve another person in an image you make, it is a two-way transaction. This is how it should be, it makes it real and valid and human. AI makes no such connection, it dismisses any bargain or agreement, it just takes in a one way flow. Even if the human who’s image is used was real, any link to the end use of their image is cursory at best.

This is a real person in a real place attending a real event. Is any other version if this shot acceptable?

You could argue nobody actually exists at the other end to bargain with, but if a human being is in the image, who or what are they meant to represent if not a real person?

Are we educating a generation that will detach from true creativity, even deny any sort of pay-in, or connection and replace these with ever increasing quick-hit sensationalism, the effect of which will blunt down to nothing sooner rather than later?

I hope not.


*This is a 1994 C&D magazine, before serious digital cameras, so photoshop was the destination of a scanned negative process and colour did have fixes, but they were far from easy or cheap.

**AI has to draw from a source, so all the elements of the manufactured images were taken at some point to some level, but not the end user.

Full Frame, A Distraction, Waste Of Money Or A Good Move?

My full frame journey is mostly finished and looking back, I still have the unsettled feeling it was all based on mistakenly perceived real world needs, pandered a little to emotional wants and was justified by some lucky purchases. I have put a formidable two camera 7 lens cinema and still rig together for $8k new. Not bad, but well spent?

It started a couple of years ago when I rightly identified a hole in my video game. I had limited grading options and time and control limits using a pair of not-upgraded G9 Mk1’s. These are capable of everything I have actually needed up to now in quality (a non-LOG profile in 1080p/422/10bit), but the thirty minute limit was problematic.

Fixes were many, but due to the G9 being a hybrid camera recently empowered by a firmware upgrade to a limited video work horse, it was hard to spend upward of a $1000au on an off-board Video Assist or Ninja V unit with confidence and although that would upgrade both G9’s it could not run both at once.

A $2k budget set as a base, what else was there?

Cameras came down to several Panasonics and the M43 Black Magic. The BMPCC went in favour of a Panasonic compatible landscape and it felt aged. The GH5 II was the head choice, a decent filler that fixed all my needs at under $2k, the GH6 was a little dear, mainly because of it’s card needs was the heart choice, but the S5 Mk1 and kit lens at just over $2k won the day as the gut choice. Superior low light performance, although not called out as an actual need and a feeling of M43 being ignored pushed it over the top.

I bought a cheap 50mm and felt I had a decent video kit for interviews, the odd long performance recording and the possibility of going into a full LOG work flow.

So far, no harm, no foul, except the GH5 Mk2, possibly with the 10-25 f1.7 still nagged at about the same price.

The G9II dropped, surprising everyone with its capabilities. It removed all the limits of the original G9, upped the AF, stabiliser and general handling of the GH6 and added twin SD slots with SSD out recording (with Pro-Res to boot) with seemingly little lost. “Best in class” and “best in any class” statements were flying around and so far, nothing has been proven wishful hyperbole.

The GH5II and a pair of G9 Mk1’s would have been the idea backup for this camera.

At the same time that I picked up the G9 II, I got a decent tax return, which allowed me to shop for bargains over the holiday period. They were many, but they were all L-Mount. The super cheap pair of 7 Artisan Spectrum lenses which are consistently excellent (the Vision lenses for M43 are a mixed bag) and the IRIX 150mm macro was a one-off, so L-Mount or nothing.

Makes my cinematographer senses vibrate, not that I get much chance with it.

A 35, 50 and 150 macro cinema lens kit for under $2k was a genuine bargain, seemed meant to be.

For some reason I felt the need to add two more Lumix lenses with a couple of decently priced primes. It felt like doubling up, it was doubling up, tripling if you count my M43 options.

Even now I am not sure what was the better option, super cheap true cinema lenses, some of which were cheaper than any decent lenses I have bought or a very harmonious set of Lumix lenses, perfectly capable of doing the job (I do not have the 24, but would have, all with follow focus rings and they are suitably “cinematic looking” and consistent across the range).

I also added a Sirui 24 Night Walker and 7Artisan Vision 12mm for M43 to round out the set where L-Mount had holes and give the G9 something cinematic to do. The 7 Art felt forced, the Sirui is excellent, only adding seeds of doubt to the move away from m43.

Things were getting silly now.

A set of lenses split over two formats? I could have easily made a more logical cinema kit (7 Art 12 and 35 Vision-the good ones of that set, 24 and 55 Sirui to match or an IRIX 21mm) or even a full anamorphic kit (24, 35 and 50 Sirui) in M43 for less. Sure the L-Mount lenses were cheaper, but not the overall kit, nor the logic of it.

I had the best everyday video option in the G9II, could have also bought both 1.7 Panasonic zooms, even empowered the lot with a BMVA 12G.

I now had one problem I wanted to fix, which was too many full frame lenses for the single S5 to service and another one I did not want to see, the missed opportunity of the more logical M43 path. The S5 is a great video camera and I rig it as such. This makes using it as a stills camera problematic, which also makes having a whole second set of stills lenses problematic.

The solution as I saw it was a second S5 cheap and one came up at $1700au with kit lens. This had issues. The S5 II did have a few more video options, but these were mostly out of my envelope of need and its AF and stabilising performance is behind the G9 II still.

Fate intervened and a long dragged out backorder overlapped with a S5 II sale, so I switched anyway. This has put things closer to right, making my Lumix kit a capable stills kit and giving me (ironically) a G9 II lite in the S5 II.

A neat kit and probably plenty for stills and video. My big issue is the size of the lenses. Taking two excludes another M43 camera and zoom.

But this does more, does most of it more confidently (except in true darkness) and fits in a very small bag.

Where could I have been?

At this point I could have been well settled with a the GH5 II, G9 II, two G9’s one probably upgraded to V-LOGL, either a set of cinema or anamorphic cinema lenses and possibly the 10-25 Panasonic, the “problem solver”.

What would I be missing?

The very low light capability of the S5’s is limited a blessing, assuming I want lots of depth of field (the normal M43 advantage is off-set by the S5’s dual ISO settings*), or if I am shooting so dark, that the super shallow depth of a wide open full frame lens is actually needed (rare but possible). The quality, especially at my base of 1080/422/10 bit in Flat or Standard profile is excellent, but so is the G9 II’s, even the G9 I’s and all of these cameras upgrade with off-board recorders equally.

I could have gone without, I can use both.


No harm, no foul.

*In depth of field math ISO 800 at f1.7 in M43 basically matches ISO 3200 at f2.8 in full frame, but the S5’s second base ISO of 4000 gives it the edge with video. I am yet to see much value with stills as M43 is enough.

A Challenge

Ok, an exercise we all need to do every now and then is to see what the gear we have, can actually do*.

  • How hard is it to exceed the maximum output of your sensor and processing?

  • How fast and erratic a subject can you hit more often than not?

  • How high an ISO can your camera and processing handle up to standard you consider acceptble?

  • How long can you use/carry/hold your camera and basic kit until you just don’t want to any more?

  • Can you manually focus/expose/white balance etc successfully and easily?

  • What are your limits in storage, battery power, heat dissipation etc. What are the things that stress you most.

Basically do you need that new camera you have been lusting after?

I have a massive hide here, buying three new cams this last year (S5, S5II, G9II), but I will try to justify them with the above criteria.

From a video perspective, I was sgort of several things I needed.

  • The ability to record for longer than half an hour. This is on three levels; storage, internal limits, power.

  • Higher bit rates and All-i recording for better overall quality of moving or busy subjects.

  • Better high ISO quality, but that was a stretch.

  • Access to better quality > V-Log

  • Access to better quality > RAW output.

  • Workable video AF for the few times I would use it.

  • Better manual controls (Wave form)

Now to be honest some or all of these were actually not too far off, but it was complicated and full of not too confidence filling pit falls.

I could upgrade either or both of my G9 Mk1 cameras for $100 each, gaining wave forms and VLog-L as well as coming across plenty of users who have Ninja V or BM 12G recorders attached (RAW recording, no limits, better storage, more power), but none of these were guaranteed and I would be spending a bit on chancy items.

The screen would also add accuracy to my manual focussing and fast cinema glass (allowing use of T1.05 to 1.2 lenses and fixing the ISO thing). I would also have saved enough to get the 10-25 f1.7 lens from Panasonic that is known to be decently capable at video AF (as are the later Olympus cameras).

I am pretty confident that if I do go for either of these, now that I have plenty of safe options, I would find everything works just fine. Possibly a pair of G9 Mk1’s upgraded with 5” BMVA 12G’s would have been more than I need, but oh well.

I will admit that the allure of better high ISO performance for stills was real, but in the field, it has proven to be more or less pointless.

Even with an older m43 camera, ISO 1600 has lately become one of my base ISO settings, ISO 3200 not far behind. Both are used with little fear of image degradation and I get a little thrill out of producing more than decent ISO 12,800 files. EM1 mk2, 40-150 f2.8, ISO 1600 1/125th.

Olympus 45mm f2.2 ISO 3200, 1/125th. Not sure why not 1.8, but still excellent quality.

ISO 1600 f1.7 Leica 15mm EM1 Mk2. This files was raised from a black background and it is clean and sharp.

*My own test results are;

  • How hard is it to exceed the output of your sensor and processing?

    I have had cropped images used on bill boards and busses, huge screens and large fine art prints all from M43 files and nobody has ever complained (or noticed), I even get compliments from full frame users on the quality I produce on average, proving that it is not the camera, but the whole creation stream. If needed I have several over 80mp options, several hand held, but so far, nobody has wanted them.

  • How fast and erratic a subject can you hit more often than not?

    The EM1x’s are as fast as I am, meaning if I do not miss, they do not miss. Any more speed would be wasted without telepathic capabilities. Even the older EM1 Mk2’s are more than enough and I have not even tried the G9II yet! I see a definite increase in hit rate with more practice, but the cameras capabilities still constantly surprise me. I have learned to give anything a go always with hope of some success. Sometime early last year, I stopped shooting sport in bursts, finding it rarely added more choices (I had it or I didn’t) and cut back massively on time and storage wastage. I think my timing actually got better.

This happened out of the corner of my eye as I was switching cameras (shoot one end with the 40-150, the other with the 12-40). I lifted framed and hit as one movement with little idea what I might get. The EM1x is faster than I am.

  • How high an ISO can your camera and processing handle up to standard you consider acceptable?

    With the latest Capture 1 and ON1 No Noise, high ISO noise is not an issue now for “getting the image”, some more testing is needed though to see if I like all that they do when stretched. This is for M43 of course, my dual ISO full frame kit may surprise me further.

  • How long can you use/carry/hold your camera and basic kit until you just don’t want to any more?

    M43 gives me plenty of options to go pro, but light, semi pro and lighter or decent enough for most used and super light. My full frame kit is limited and the Lumix lenses light also, so overall, still happy. I often pull 6-8 hour days at school sports events and can pull up tired, but try carrying a full frame 600 f4, 80-300 f3.8, 150 f1.8, 16-35 f2.8 and two bodies around all day and you will appreciate the M43 difference.

It does not always take pro level gear to get the shot.

  • Can you manually focus/expose/white balance etc successfully and easily?

    For stills, this is fine as needed. For video I have several levels of this from rear to large screens, all good enough at this level. For video it is important to control white balance, often focus and exposure manually and accurately, which I can.

  • What are your limits in storage, battery power, heat dissipation etc. What are the things that stress you most?

    In the S5’s and G9II I have constant power in from power banks and I have several of those now. My many Zoom devices were an issue here also, which I have fixed with power banks.

    With power sorted, storage came next. The G9II has SSD out, which unfortunately has to share a USB-C port with power in, so it is a choice between longer power or more storage, but at worst I have 1 hr or more of battery or a 128gb SD card limit (about 2hrs of 1080/10 bit/422). If I get a dummy battery, I can have both, so 1TB of memory and AC power. Cages and rails add the needed connection options.

    Heat is rarely an issue here thanks to our temperate climate, I have plenty of spare cords and cables and duplicate everything (sound, storage, power).

Getting It Right. Depth Of Field And Apertures.

This is a technical post, but hopefully it will help someone out there.

Been a bit grumpy lately.

Grumpy may be the wrong term, maybe dismayed, concerned, sad even.

Getting annoyed at people teaching people the wrong things or the right things the wrong way should not be a big issue (or really a thing at all), but it seems so common at the moment, I feel I should put my money where my mouth is.

I am talking about photo and video terminology of course, my bugbear.

More specifically depth of field because it is (1) the most commonly abused, (2) the one that does the most harm when it is miss-used, because (3) it is important to get right technically and creatively and (4) the hardest one to get your head around anyway, so why screw it up early?

This image has depth of field rules at work, but how would you describe them?

Speed is speed which makes shutter speeds easy to learn and ISO to noise ratios also make sense, but apertures and depth of field are the tricky one.

It is far too easy to confuse others by getting this wrong, or right even, after someone else got it wrong before you.

Depth of field (DoF) is a term used to describe the amount of an image that is sharply in focus in front of and behind the point of best focus (where you focussed). By the rules that govern it, more depth is rendered behind the focus point regardless of other elements, because as you get further away from anything the depth of field increases as the relative distance increases.

Unless you are photographing a flat surface like a brick wall, depth of field will always play a part in an image. An image only needs a definable front, middle and back for depth of field to play a part.

The focus point for this image was about at the broken-up bit of the top of the rock. This guaranteed that depth of field in the foreground was covered, the back would take care of itself. Even if your depth of field does not keep everything in focus, it is far more natural to have it taper off to soft blur in the background. This image is “landscape” sharp to about the second rock, then depth of field drops off.

It follows that if you get closer to your focus point DoF decreases to the point where macro photographers (tiny insect and flower chasers etc) have depth of field front and centre of their thinking, all the time.

Apertures, magnification, subject distance, subject to background distance, lens rendering and capture format size all play a role to some extent, so learning only one term or control does not conquer it, it is just a start.

Like a lot of things in photography, things seem to work counter intuitively, but that is just the way it is.

Some terminology.

Apertures are also called “F” stops in photography and “T” stops in cinema. These are similar in use, but cinema T-stops are more accurate to the actual light transmission of the lens rather than a theoretical mathematical value.

Apertures are usually measured in full “stops” of f1.4, 1.8, 2, 2.8, 4, 5.6, 8, 11, 16, 32, 64, each letting in half as much light as the one to their left or twice as much as the one to their right. If you want to see this in action, look down the lens barrel when taking an image at a wide and small aperture. This is easiest with a “fast” prime lens (see below).

There are also half, third and quarter values, but generally the full values are used to describe lens maximums and the valid steps.

A lens has a “speed” value which usually determines it size, weight and cost. This is the maximum aperture or maximum light gathering value at the widest aperture settings. It is called a speed value because it determines the fastest shutter speed and/or ISO the photographer can use.

A fast lens lets in more light > allows a faster shutter to freeze motion, avoid camera shake and/or > allows a lower ISO setting for better image quality.

Cheaper zoom lenses often have slow and variable maximum apertures, especially on their longer end when the barrel extends (like f3.5 to 5.6). Better zooms and fixed focal length lenses (prime lenses) usually have faster and more consistent ones like f2.8 or wider. Apertures wider than f2.8 are usually reserved for prime or non-zoom lenses.

Super fast lenses are always prime lenses with apertures as fast as f1.2 or even f0.95, which means they are actually sometimes wider at those apertures than their lens barrel is long, but these are rare, expensive and sometimes poor quality at that setting.

My fastest lens is a Sirui cinema lens that has a T1.2 (f1.1) maximum aperture. It is a decent performer at that setting.

A wide aperture;

  • Is a smaller aperture number*. It is a small number because it is a measure of “calibres” or how many times the aperture hole can be divided into the physical lens barrel length. F2.8 means 2.8 times etc.

  • Focus on the main element of the image like an eye.

  • This renders shallow depth of field (not “a depth of field”, just depth of field**), which means the sharp plane of best focus drops away quickly to softer, out of focus areas, often called Bokeh, but that is another story.

  • You open a lens up to it’s wider apertures, or “open it up”.

  • Using the lens at its widest aperture means it is set “wide open”, regardless of what maximum aperture that is. My slowest lens has a maximum aperture of f6.7 at 300mm, which is still “wide open” for that lens.

  • Using a lens at its widest aperture may mean it is not at its optical best. The common issue with using wide aperture settings used to be colour fringing, where the different colours of light changed speed as they passed through glass and failed to agree on the focus point at the same time with very shallow depth of field, but this is mostly fixed now with highly corrected glass. This is known as Chromatic Aberration or purple fringing. If in doubt, lenses tend to get near their best one to three apertures in from wide open.

A small aperture;

  • Is a large number*, because again the small hole divides more times into the lens length. An aperture of F22 for example is a tiny opening dividing 22 times into the lens length.

  • You close a lens down to smaller apertures, or “stop it down”.

  • Using a lens at it’s smaller aperture would mean “fully stopping it down”.

  • Smaller apertures render more depth of field than wider ones. Very small apertures render the deepest depth of field possible.

  • At very small apertures, usually f16 to 64, but also depending on the camera format used, diffraction* of the light making the image on the aperture edges can reduce quality, but this is subtle and often less of a problem than being out of focus or too little depth of field.

*An easy way to remember this counter intuitive scale is to pretend that aperture vales are measurements of depth. Pretend that f22 means 22 metres as opposed to f2.8 being less than 3m and it makes some sense.

There are other factors at work also.

Lens magnification.

Wider lenses expand perspective and make depth of field look, while longer lenses compress things together so they seem to make depth of field look shallower.

This is another reason why landscape photographers are drawn to wide lenses, because using long lenses often makes it difficult to get everything sharp, while portraitists love longer lenses, because they want to hero their subject and blur out the rest.

Format or sensor size.

The above image was taken with a 35mm lens on a full frame camera. The two below are (left) a true 50mm on the same camera and (right) the above image cropped to match (like it would be on an APS-C format camera).

The same aperture was used (f5.6) and focus was made manually for consistency. The left hand image has less depth of field (look at the mat on the right and the chair behind) because a 50mm lens will magnify more than a 35mm, even though the crop of the right hand image seems to be the same otherwise. Both effects have their uses, neither is “better”.

Basically, the smaller the format the greater the effective depth of field all else being the same.

This is why people often accuse smaller format cameras of lacking the ability to render relatively shallow depth of field and why Go-Pro’s, phones and small compacts need special effect modes to achieve blurry background portraits because they have very short focal length lenses on very small sensors. It is also why they are very capable closeup or landscape cameras, showing the benefits of smaller sensors and lenses.

Large format cameras often use lens tilting to add dept of field by shifting the angle of the plane of focus and smaller sensor cameras are more susceptible to diffraction because of the relatively short lenses needed (remember these are a ratio, not a fixed size). In full frame the ideal is about f8 to f11, but in M43 it drops to about f5.6.

This is very important to understand as the actual characteristics of any lens is meaningless without knowing the film format or sensor size of the camera it is mounted on and the rules that govern its use.

A 40mm for example is a super wide lens on a large format camera, a wide angle on a medium format, standard-wide on a full frame or 35mm camera, a short telephoto on an APS-C or Super-35 format, a true portrait lens on M43 format or a long telephoto on a small format compact, so just saying “I use a 40mm” without qualification is no real help.

Except……..

The 40mm above will render the same depth of field at the same aperture on any format at the same lens to subject distance and the same focussing point.

The rules are the same, the lenses just need to be used differently on different formats. Personally I am drawn to the versatility and flexibility of M43 depth of field/magnification rendering, something I am reminded of when I use the less forgiving full frame format.

This image was taken with a 75mm lens at f1.8 on a M43 camera. Depth of field is basically the length of the phone, the subject about ten feet away. The background is the other side of the street, so relatively distant. Any less depth and the image could loose its meaning. This is the same depth of field as a full frame 75mm, but at double the distance.

The tiny little 45mm f1.8 has reach (90mm equivalent on full frame) and speed at f1.8, while still providing shallow enough depth to show a clearly cut out the main subject and retain enough depth for some context. A 90mm full frame lens would more dramatically drop the background out, but to what purpose? From a practical point of view, a clients point of view, there is such a thing as depth of field that is too shallow for their needs.

The advantage of smaller formats, this image was taken on a 9mm lens near wide open (f2.8) and manually focussed at about one foot. The riders were only a few inches away. The bleachers in the background are almost sharp, but so is the foreground, which is harder to achieve! This is the same depth of field as a full frame 9mm, but acting as a less extreme full frame 18mm.

Confused yet?

Ok, it gets worse.

Focus points and Distance to subject and subject to background.

Depth of field also decreases as you get closer to the subject or increases as you get further away. With your own eyes, focus on a mountain in the distance and everything seems equally sharp. Focus on the hand in front of your face and it is very hard to get anything else sharp.

It is always best to focus forward in a scene, like the front row of a group of people rather than to the back, because as distance increases so does depth of field so there is more depth of field behind the focus point than in front.

This gets more exaggerated as distances increase or decrease. Looking into the night sky, all the stars may look similarly sharp, but they may be billions of miles apart. The relevant factor here is the nearest one is a long, long way away, so they are all relatively distant. Conversely, focus on the eye of an insect or tip of a stamen and nothing much else will be in focus, no matter what aperture you use.

Above, a lucky grab of a little bit of a 1cm long fly at T3 (f2.8) on a long full frame macro lens (150mm), shot lengthways. Artistically pleasant, this is a waste of pixels to a scientist.

Another macro image deliberately taken to push shallow depth and focus accuracy to it’s limits.

This image was taken with a relatively long lens (300mm on a M43 camera) at f4. Because the subject was quite close and the shot was taken low, the background is quite blurred, but even the shoulder is a little soft. The aperture of f4 would normally be considered a semi-wide aperture, but the long lens and close subject have exaggerated it’s effect.

The final factor is subject distance to their background. Standing someone up against a wall and hoping to blur out the background is often a waste of effort. A good guide is to place a subject at least as close to you as they are from their background if you want some portrait blur.

This image was taken with the same lens and aperture, but because all the boats are relatively close to each other and far from me, they look similarly in focus at first glance. There is focus plane separation (shallow depth of field), but it is not exaggerated making the front crew blend with the ones behind. The official in the background is probably 50 meters behind the front boat, but still closer to it than I am.

This image was shot wide open at f1.8 with a 25mm on a M43 camera. The lens is relatively wide compared to a full frame 50mm, the sensor increasing its magnification to match, but all the other elements (nearness of the subject’s nose, relative to her eyes) are enough for obvious shallow depth of field. If all else was the same with the full frame 50mm, the very front of the nose would be sharp but not much else.

Ok, lets look at all of these elements together.

If you wanted the very shallowest depth of field possible you would;

  • Use the widest aperture you have (smallest number = biggest aperture hole).

  • Use the longest lens you can (probably on the largest sensor available for practicality).

  • Place the subject closer to you and further away from its background.

  • Shoot lengthways down the subject, exaggerating the near-far effect.

A long lens, wide aperture, relatively close shooting distance and relatively greater distance to the background have all the elements needed to “cut out” the subject. Notice that even the relatively close foreground flower is soft, but the one further away behind (bottom right) is less so.

If on the other hand you want the most or deepest depth of field you can achieve;

  • Use a small aperture (big number), but balance that with the limits of the format. Smaller format short lenses suffer from diffraction sooner than larger ones.

  • Use a wider lens.

  • Find out the hyper-local distance of the lens and camera you are using (there are apps available). Remember to focus forward of the middle of your desired depth of field, which the hyper-focus calculation will determine.

  • Compose the image with all the elements at a similar distance and make that distance further away. The main trick is to avoid near-far challenges

  • If you can, change the focal plane angle by tilting the angle of view (camera), effectively turning front-to-back into top-to-bottom.

I forget the specifics, but I know this was a M43 camera, so a smaller sensor, a 12-60 kit lens, probably at about 14-17mm and f5.6. Focus was likely on the greyish bush or fence post in the middle distance or maybe a little further back. In full frame this would need a 35mm at f11 for a similar result as the longer lens (with same angle of view) would reduce real depth of field.

*Diffraction is always present, but as the aperture becomes smaller, the edges tend to dominate the image area, so its effect increases. Been a bit grumpy lately.

**Calling using a fast lens aperture with shallow depth “a depth of field” is like calling a bright bulb “a brightness”.